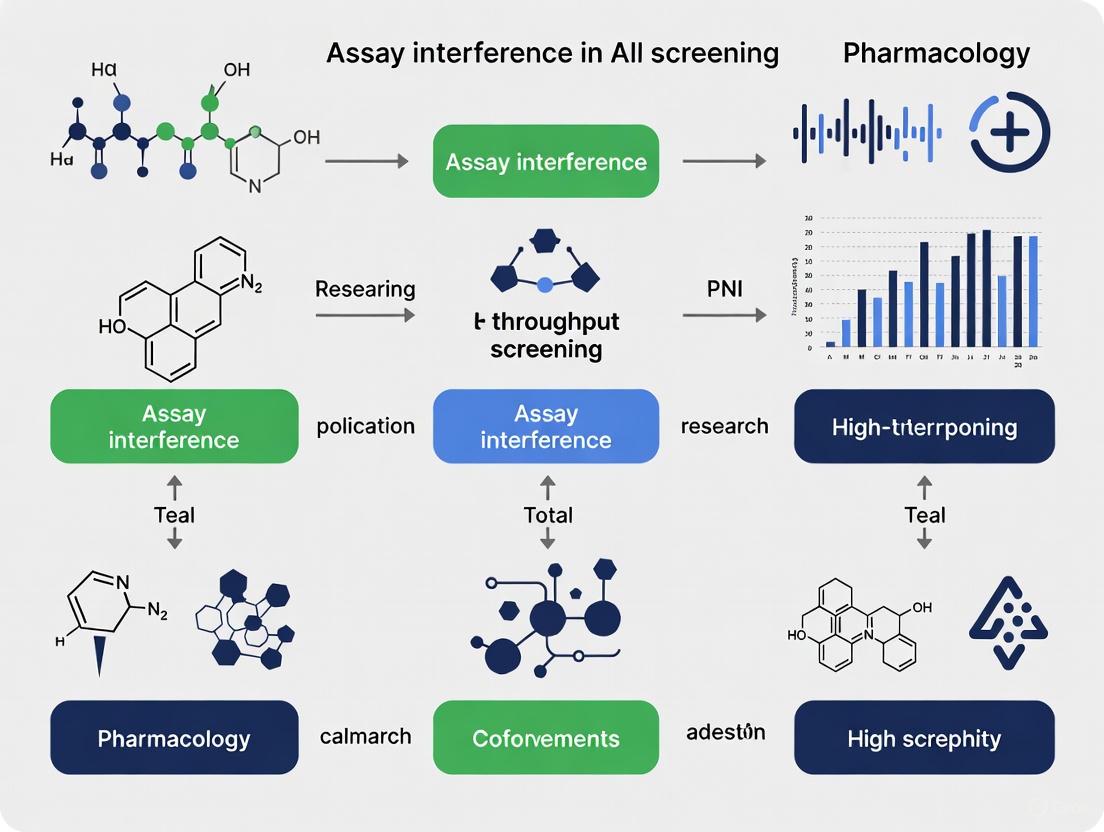
Navigating Assay Interference in High-Throughput Screening: From Foundational Concepts to AI-Driven Solutions
This article provides a comprehensive guide for researchers and drug development professionals on addressing the critical challenge of assay interference in High-Throughput Screening (HTS).
Navigating Assay Interference in High-Throughput Screening: From Foundational Concepts to AI-Driven Solutions
Abstract
This article provides a comprehensive guide for researchers and drug development professionals on addressing the critical challenge of assay interference in High-Throughput Screening (HTS). It covers the foundational knowledge of interference mechanisms, including luciferase inhibition and compound autofluorescence, and explores advanced methodological applications such as machine learning prediction tools like InterPred and counter-screen assays. The content delivers practical troubleshooting and optimization strategies to enhance assay robustness using metrics like the Z'-factor and offers a framework for rigorous hit validation through orthogonal assays and interference testing. By synthesizing current research and best practices, this resource aims to empower scientists to minimize false positives, conserve valuable resources, and accelerate confident hit discovery.
Understanding the Enemy: Foundational Mechanisms of Assay Interference in HTS
Defining Assay Interference and Its Impact on HTS Data Quality
Assay interference occurs when compounds generate false positive or false negative results in high-throughput screening (HTS) through mechanisms unrelated to the intended biological target [1] [2]. These interfering compounds can directly affect the detection technology, react with assay components, or cause nonspecific effects that ultimately compromise data quality and lead to wasted resources on false leads [3]. In HTS campaigns, a substantial proportion of initial hits can be artifacts caused by such interference, making their identification crucial for successful drug discovery [2] [4].
Chemical Mechanisms of Interference
Interference compounds exhibit several chemical mechanisms that can disrupt assay readouts:
- Thiol reactivity: Compounds containing electrophilic functional groups can covalently modify cysteine residues on proteins or react with thiol-containing assay components like Coenzyme A [3].
- Fluorescence effects: Autofluorescent compounds emit light that overlaps with the assay's detection wavelengths, while quenchers absorb light and reduce signal intensity [1] [5].
- Luciferase inhibition: Chemicals can directly inhibit firefly luciferase enzyme activity or oxidize the luciferin substrate in reporter gene assays [5].
- Chemical aggregation: Compounds forming colloidal aggregates can non-specifically sequester proteins [3].
- Redox activity: Molecules that generate reactive oxygen species or undergo redox cycling can oxidize assay components [3].
- Chelation: Compounds that bind essential metal ions can disrupt metalloenzyme function [3].
Technology-Specific Interference
Different detection technologies face distinct interference profiles [1]:
Table 1: Interference Profiles by Detection Technology
| Detection Technology | Major Interference Mechanisms | Strategies to Minimize Interference |
|---|---|---|
| Fluorescence Intensity | Inner filter effect, autofluorescence, quenching | Use red-shifted dyes, time-resolved measurements |
| Fluorescence Polarization (FP) | Light scattering, autofluorescence | Ratiometric readouts, optimized filters |
| TR-FRET/HTRF | Compound fluorescence, quenching | Time-resolving step, lanthanide chelates |
| Luminescence | Luciferase inhibition, substrate oxidation | Cell-free counterscreens, alternative reporters |
| AlphaScreen | Singlet oxygen quenching | Additives, concentration optimization |
Identifying and Quantifying Assay Interference
Experimental Detection Methods
Specialized assays have been developed to detect and quantify interference mechanisms:
Luciferase Inhibition Assay: A cell-free system containing firefly luciferase enzyme and D-luciferin substrate identifies compounds that directly inhibit luciferase or interfere with the luminescent reaction [5].
Autofluorescence Assays: These measure compound interference at multiple wavelengths (red, blue, green) under both cell-free and cell-based conditions using different cell types (e.g., HEK-293 and HepG2) [5].
Orthogonal Assays: These confirm bioactivity using independent readout technologies (e.g., following a fluorescence-based primary screen with luminescence- or absorbance-based readouts) [2].
Counter Screens: Designed to bypass the biological reaction and directly measure compound effects on the detection technology itself [2].
Computational Prediction
Machine learning approaches now enable prediction of assay interference based on chemical structure:
Table 2: Computational Approaches for Interference Prediction
| Method | Application | Performance |
|---|---|---|
| PAINS Filters | Rule-based substructure alerts for promiscuous compounds | Widely used but with limitations |
| InterPred Tool | Web-based prediction of fluorescence and luciferase interference | ~80% accuracy [5] |
| Technology-Specific ML Models | Random forest and multilayer perceptron classifiers | MCC: 0.45-0.47 on external test sets [4] |
| Historic HTS Data Analysis | Identification of frequent hitters across multiple campaigns | Depends on data set size and diversity |
Impact on HTS Data Quality
Effects on Hit Identification
Assay interference directly impacts HTS outcomes by:
- Increasing false positive rates: In one HTS campaign targeting Rtt109, only 3 of 1,500 primary hits were confirmed as true inhibitors after triage [3].
- Masking true activity: Interference can obscure legitimate bioactivity, leading to false negatives.
- Wasting resources: Pursuing interference compounds consumes significant time and budget on hit validation.
- Compromising decision-making: Artifacts can derail project direction and structure-activity relationship studies.
Quantitative Assessment of Interference Prevalence
Large-scale studies reveal the scope of interference across chemical libraries:
Table 3: Interference Prevalence in Tox21 Library (8,305 Chemicals)
| Interference Type | Assay System | Active Chemicals |
|---|---|---|
| Luciferase Inhibition | Cell-free biochemical | 9.9% |
| Blue Autofluorescence | Cell-based (HEK-293) | 6.9% |
| Green Autofluorescence | Cell-based (HEK-293) | 5.5% |
| Red Autofluorescence | Cell-based (HEK-293) | 0.5% |
| Blue Autofluorescence | Cell-based (HepG2) | 5.3% |
| Green Autofluorescence | Cell-based (HepG2) | 4.8% |
| Red Autofluorescence | Cell-based (HepG2) | 0.6% |
Troubleshooting Guides
FAQ: Addressing Common Interference Issues
Q: How can I determine if my hit compounds are exhibiting assay interference?
A: Implement these systematic approaches:
- Test compounds in a counter-screen that mimics the detection technology without the biological system [2]
- Examine concentration-response curves for abnormal characteristics (e.g., steep Hill slopes, bell-shaped curves) [2] [3]
- Perform orthogonal assays with different detection technologies [2]
- Assess compound behavior in interference-specific assays (e.g., autofluorescence, luciferase inhibition) [5]
Q: What assay design strategies can minimize interference?
A: Several technical approaches can reduce interference:
- Use homogeneous time-resolved fluorescence (HTRF) or TR-FRET to leverage temporal discrimination between short-lived compound fluorescence and long-lived lanthanide signals [1]
- Employ red-shifted dyes (>620nm) where fewer compound interference problems occur [1]
- Implement ratiometric readouts (e.g., FP, FRET) that self-normalize interference effects [1]
- Add detergents (e.g., Triton X-100) to mitigate aggregation-based interference [3]
- Include bovine serum albumin (BSA) or other additives to reduce nonspecific binding [2]
Q: What computational tools can help identify potential interferents before screening?
A: Several resources are available:
- InterPred (https://sandbox.ntp.niehs.nih.gov/interferences/) for predicting fluorescence and luciferase interference [5]
- PAINS filters to flag pan-assay interference compounds [3]
- Custom machine learning models trained on historical HTS data [4]
- Cheminformatics analysis to identify problematic substructures [3]
Q: How should I handle autofluorescent compounds in my screen?
A: For confirmed autofluorescent compounds:
- Evaluate whether the autofluorescence signal overlaps with your detection wavelengths [1]
- Consider using fluorescence lifetime (FLT) detection, which is unaffected by autofluorescence as it discriminates based on decay kinetics [1]
- Implement fluorescence correlation spectroscopy (FCS+) with multi-parameter readouts to treat rather than exclude autofluorescent compounds [1]
- Switch to non-fluorescence detection methods if autofluorescence cannot be mitigated [2]
Experimental Protocols
Protocol 1: Luciferase Interference Assay
Purpose: Identify compounds that inhibit firefly luciferase activity [5].
Reagents:
- D-Luciferin substrate (Sigma-Aldrich)
- Firefly luciferase enzyme (Sigma-Aldrich)
- Assay buffer: 50 mM Tris-acetate pH 7.6, 13.3 mM magnesium acetate, 0.01 mM D-luciferin, 0.01 mM ATP, 0.01% Tween, 0.05% BSA
- Positive control: PTC-124 (Santa Cruz Biotechnology)
Procedure:
- Dispense 3 μL substrate solution into white 1536-well plates
- Transfer 23 nL test compounds or controls using pintool
- Add 1 μL of 10 nM luciferase enzyme solution to all wells except controls
- Incubate 5 minutes at room temperature
- Measure luminescence intensity using Viewlux plate reader
- Analyze concentration-response curves for luciferase inhibition
Data Analysis: Fit concentration-response data to Hill equation. Compounds showing concentration-dependent inhibition of luminescence are flagged as luciferase interferents.
Protocol 2: Autofluorescence Assessment
Purpose: Quantify compound autofluorescence at multiple wavelengths [5].
Reagents:
- Cell culture media (appropriate for cell type)
- HEK-293 or HepG2 cells (ATCC)
- Assay buffers without fluorescent probes
Procedure:
- Prepare compound dilution series in appropriate media
- Dispense compounds into black-walled clear-bottom plates
- For cell-based measurements, seed cells and incubate overnight before compound addition
- For cell-free measurements, add compound to media alone
- Incubate under standard assay conditions
- Measure fluorescence at blue, green, and red wavelengths using appropriate filters
- Compare to vehicle control wells
Data Analysis: Calculate fold-increase over background fluorescence for each wavelength. Compounds showing concentration-dependent increases are flagged as autofluorescent.
Visualization of Interference Mechanisms and Workflows
Figure 1: Assay Interference Mechanisms and Their Impact on HTS
Figure 2: Hit Triage Workflow for Interference Identification
The Scientist's Toolkit: Research Reagent Solutions
Table 4: Essential Reagents for Interference Assessment
| Reagent/Assay | Function | Application Context |
|---|---|---|
| CPM (N-[4-(7-diethylamino-4-methylcoumarin-3-yl)phenyl]maleimide) | Thiol-reactive fluorescent probe | Detection of free thiols in enzymatic assays; identification of thiol-reactive compounds [3] |
| D-Luciferin + Firefly Luciferase | Luciferase inhibition assay components | Cell-free system for identifying luciferase interferents [5] |
| Triton X-100 | Non-ionic detergent | Prevents compound aggregation; final concentration 0.01% [3] |
| Bovine Serum Albumin (BSA) | Protein additive | Reduces nonspecific compound binding [2] |
| Trolox or Other Antioxidants | Singlet oxygen quencher | Mitigates redox cycling interference [3] |
| Europium or Terbium Chelates | TR-FRET donors | Time-resolved detection to minimize compound fluorescence [1] |
| Red-Shifted Fluorophores (e.g., Cy5) | Fluorescent dyes with excitation >620nm | Minimize interference from compound absorption [1] |
| CellTiter-Glo | Cell viability assay | Counterscreen for cytotoxicity interference [2] |
Firefly luciferase (FLuc) is a vital enzyme in molecular biology and high-throughput screening (HTS), enabling highly sensitive detection of biological processes through bioluminescence. However, its utility is compromised by a significant challenge: luciferase inhibition by small molecules. This phenomenon represents a major source of assay interference in drug discovery and basic research, leading to false positives and complicating data interpretation. Understanding the mechanisms, prevalence, and solutions for luciferase inhibition is therefore essential for ensuring the reliability of screening data and the accurate identification of biologically active compounds.
Quantitative HTS profiling of large compound libraries has revealed that approximately 3-12% of typical screening collections contain compounds that inhibit firefly luciferase [6] [7]. This high prevalence means that researchers working with luciferase-based assays will frequently encounter this form of interference. The problem is particularly pronounced in HTS campaigns, where one study found that ~60% of initial hits from a cell-based luciferase reporter assay were actually luciferase inhibitors rather than genuine activators of the targeted biology [7]. This startling statistic underscores the critical importance of recognizing and controlling for luciferase inhibition in experimental design.
Mechanisms of Luciferase Inhibition
Biochemical Inhibition Pathways
Firefly luciferase catalyzes a complex, multi-step reaction involving luciferin, ATP, and oxygen to produce light. Small molecules can interfere with this process through several distinct biochemical mechanisms:
Competitive Inhibition with Substrates: Many inhibitors compete with luciferin (LH2) or ATP for binding at the enzyme's active site. These compounds often share structural similarities with the natural substrates or reaction intermediates [8] [6]. The most prevalent chemotypes include benzothiazoles, benzoxazoles, benzimidazoles, and oxadiazoles, which mimic aspects of the luciferin structure [6].
Formation of Multisubstrate-Adduct Inhibitor (MAI) Complexes: Certain inhibitor classes, particularly aryl carboxylates appended to 3,5-diaryl-oxadiazole scaffolds, can undergo FLuc-catalyzed reactions that generate stable, multisubstrate adducts within the enzyme active site. These MAIs effectively trap the enzyme in an inactive state [6].
Interference with Cofactors and Essential Components: Metal ions can significantly interfere with luciferase activity. Divalent metal ions such as Zn²⁺, Cu²⁺, Fe²⁺, and Hg²⁺ inhibit FLuc, with their potency generally following the Irving-Williams series (Cu > Zn > Fe > Mn > Ca > Mg) [9]. These ions may interact with enzyme thiol groups, compete with essential Mg²⁺, or cause precipitation of luciferin [9].
Non-specific Inhibition Mechanisms: Some compounds cause inhibition through aggregation-based mechanisms or by disrupting the enzyme's tertiary structure. Anesthetics, alcohols, alkanes, and fatty acids have been shown to inhibit FLuc, potentially through binding to hydrophobic pockets or causing conformational changes [8].
The Paradox of Cell-Based Systems: Inhibitor-Induced Signal Activation
In cell-based luciferase reporter assays, certain inhibitors can produce a counterintuitive phenomenon: apparent activation of the bioluminescence signal. This occurs through a stabilization mechanism where inhibitor binding protects luciferase from cellular degradation pathways [7]. The stabilized enzyme accumulates during extended compound incubation periods (typically 18-24 hours). When the detection reagent containing excess luciferin is added, the inhibitor is competed off, resulting in higher measured luminescence compared to untreated controls [7]. This stabilization effect can lead to 150% increases in luciferase levels within 12 hours, creating false activators that can misdirect research efforts [7].
Prevalence and Chemical Drivers of Interference
Quantitative Assessment of Inhibitor Prevalence
Large-scale profiling studies have provided comprehensive data on the prevalence and structural features of luciferase inhibitors:
Table 1: Prevalence of Firefly Luciferase Inhibitors in Compound Libraries
| Screening Context | Library Size | Inhibitor Prevalence | Most Potent Inhibitors | Primary Citation |
|---|---|---|---|---|
| NIH MLSMR Library | ~360,000 compounds | ~12% (43,885 compounds) | 168 compounds with IC₅₀ < 100 nM | [6] |
| Tox21 Consortium | 8,305 compounds | 9.9% (luciferase inhibition assay) | N/A | [5] |
| General HTS Libraries | Variable | ~3% background rate | Single-digit nM potencies observed | [7] |
High-Risk Chemotypes and Structural Alerts
Analysis of confirmed luciferase inhibitors has identified specific structural classes that are overrepresented among active compounds:
- Heteroaromatic Systems: Thiazoles, imidazoles, oxadiazoles, and benzimidazoles are prevalent among potent inhibitors, particularly when flanked by aryl substituents [6].
- Planar, Linear Structures: Small, planar molecules with linear configurations tend to show greater inhibitory potency compared to angular or branched analogs [6].
- Quinoline Derivatives: These compounds demonstrate both potent inhibition in biochemical assays and stabilization effects in cellular systems [7].
- Carboxylate-Containing Compounds: Specifically, benzoic acids appended to 3,5-diaryl-oxadiazole scaffolds that can form multisubstrate adduct inhibitor complexes [6].
Experimental Protocols for Identification and Validation
Biochemical Counter-Screening Protocol
Purpose: To identify compounds that directly inhibit firefly luciferase enzyme activity in a cell-free system.
Reagents and Solutions:
- Purified Photinus pyralis firefly luciferase (commercial source)
- D-Luciferin substrate
- ATP solution in magnesium-containing buffer
- Tris-acetate assay buffer (50 mM, pH 7.6)
- Test compounds in DMSO
- Positive control inhibitor (e.g., PTC-124)
Procedure:
- Prepare substrate mixture containing 50 mM Tris-acetate (pH 7.6), 13.3 mM magnesium acetate, 0.01 mM D-luciferin, 0.01 mM ATP, 0.01% Tween-20, and 0.05% BSA [5].
- Dispense 3 μL substrate mixture into white 1536-well plates using a flying reagent dispenser.
- Transfer 23 nL test compounds, controls, or DMSO to assay plates using a pintool station.
- Add 1 μL of 10 nM luciferase enzyme solution to all wells except negative control wells.
- Incubate at room temperature for 5 minutes.
- Measure luminescence intensity using a plate reader (e.g., ViewLux) [5].
- Analyze concentration-response curves and calculate IC₅₀ values for inhibitory compounds.
Key Considerations: Use KM concentrations of substrates to maximize sensitivity to competitive inhibitors. Include detergent (Tween-20) to reduce aggregation-based inhibition artifacts [10].
Cell-Based Stabilization Assay Protocol
Purpose: To identify compounds that stabilize luciferase in cellular environments, leading to potential false activation signals.
Reagents and Solutions:
- HEK293 or HepG2 cells stably expressing P. pyralis luciferase
- Cell culture medium (DMEM or EMEM with 10% FBS)
- Test compounds in DMSO
- Cycloheximide solution (translation inhibitor)
- Luciferase detection reagent with excess substrate
- Cell lysis buffer
Procedure:
- Plate cells in 96-well or 384-well format and incubate overnight.
- Treat cells with test compounds for 18-24 hours [7].
- For stabilization assessment: Add cycloheximide to stop new protein synthesis and measure luciferase activity at intervals over several hours [7].
- Detect luciferase activity using a detection reagent containing excess luciferin.
- Compare signal decay rates between compound-treated and vehicle-treated cells.
- Parallel assessment: Test same compounds in biochemical inhibition assay.
Interpretation: Compounds that show apparent activation in cellular assays but inhibition in biochemical assays, and that slow signal decay in cycloheximide chase experiments, are likely stabilizers [7].
Research Reagent Solutions for Mitigation
Table 2: Essential Reagents for Luciferase Interference Studies
| Reagent/Category | Specific Examples | Function/Application | Key Considerations |
|---|---|---|---|
| Luciferase Enzymes | Purified P. pyralis firefly luciferase | Biochemical counter-screening | Use fresh preparations; check activity regularly |
| Luciferase Substrates | D-Luciferin, Coelenterazine, Furimazine | Enzyme activity measurement | Substrate-specific for different luciferases; stability varies |
| Control Inhibitors | PTC-124, known FLuc inhibitor chemotypes | Assay validation and QC | Include in every counter-screen plate |
| Detection Kits | Dual-Luciferase Reporter Assay System | Normalization and specificity | Enables ratiometric measurements with internal controls |
| Cell Lines | HEK293-Luc, HepG2-Luc stably expressing luciferase | Cell-based stabilization assays | Monitor passage number and expression stability |
| Buffer Components | Tris-acetate, HEPES, Mg²⁺, EDTA | Optimal reaction conditions | EDTA can chelate inhibitory metal ions [9] |
| Detergents | Tween-20, Triton X-100 (0.01-0.1%) | Reduce aggregation artifacts | Critical for biochemical assays; optimize concentration [10] |
Frequently Asked Questions (FAQs)
Q1: Why do some luciferase inhibitors appear as activators in my cell-based assays? This paradoxical activation occurs due to inhibitor-mediated stabilization of the luciferase enzyme. When inhibitors bind to luciferase in cells, they can protect the enzyme from degradation, leading to accumulation during long incubation periods. When detection reagent with excess substrate is added, the inhibitor is competed off, resulting in higher measured signal compared to controls [7].
Q2: What percentage of compounds in a typical screening library will inhibit firefly luciferase? Comprehensive profiling indicates that approximately 3-12% of compounds in diverse screening libraries will inhibit firefly luciferase, with about 1.5% showing potent, high-quality inhibition [6]. In some cell-based assays, luciferase inhibitors can comprise up to 60% of initial hits [7].
Q3: Which chemical structures should raise suspicion for potential luciferase inhibition? High-risk chemotypes include benzothiazoles, benzoxazoles, benzimidazoles, oxadiazoles (particularly 3,5-diaryl substituted), quinolines, and certain carboxylate-containing compounds. Small, planar molecules with linear configurations are particularly prone to inhibition [6].
Q4: How can I distinguish true biological activity from luciferase inhibition artifacts? Implement orthogonal assays using different reporter systems (e.g., β-lactamase, GFP, SEAP) that are not susceptible to the same interference mechanisms [10]. Additionally, perform biochemical counter-screens against purified luciferase and examine compound effects in cellular stabilization assays [7].
Q5: What experimental conditions can reduce luciferase inhibition artifacts? Including low concentrations of non-ionic detergents (0.01-0.1% Triton X-100) can reduce aggregation-based inhibition [10]. Using EDTA in buffers can chelate inhibitory metal ions [9]. Employing dual-reporter systems with normalization controls helps identify specific interference [11].
Q6: Are other luciferase enzymes (Renilla, NanoLuc) susceptible to similar interference? While all enzymatic reporters can experience interference, the specific inhibitors and mechanisms differ. Firefly luciferase appears particularly susceptible to stabilization artifacts in cell-based systems. However, metal ion interference affects multiple luciferase types, with variation in specific ion sensitivity profiles [9].
Q7: How do metal ions interfere with luciferase assays? Divalent metal ions such as Zn²⁺, Cu²⁺, and Fe²⁺ can inhibit firefly luciferase by interacting with enzyme thiol groups, competing with essential Mg²⁺, or causing luciferin precipitation. Their inhibitory potency generally follows the Irving-Williams series (Cu > Zn > Fe > Mn > Ca > Mg) [9].
Luciferase inhibition represents a significant challenge in biomedical research, particularly in high-throughput screening environments where it can profoundly impact hit identification and validation. The complex mechanisms—ranging from direct enzymatic inhibition to cellular stabilization effects—require researchers to employ sophisticated counter-screening strategies. By understanding the prevalence, structural alerts, and experimental approaches outlined in this technical guide, researchers can better discriminate between true biological activity and assay interference, ultimately increasing the reliability and efficiency of their luciferase-based investigations.
In high-throughput screening (HTS) research, compound autofluorescence represents a significant source of assay interference that can compromise data quality and lead to false positive or false negative results. Autofluorescence describes background fluorescence in a tissue or assay that is not attributed to the specific staining of an antigen-antibody-fluorophore interaction [12]. This phenomenon arises from multiple causes, including intrinsic properties of test compounds, endogenous tissue components, and fixation artifacts. Within the Tox21 screening program, which tested 8,305 unique chemicals, autofluorescence and luciferase inhibition were found to affect a substantial portion of compounds, with active interference rates ranging from 0.5% (red autofluorescence) to 9.9% (luciferase inhibition) [5]. Understanding, identifying, and mitigating compound autofluorescence is therefore essential for maintaining confidence in HTS data and avoiding costly misinterpretations in drug discovery and development pipelines.
Understanding the Mechanisms
What is compound autofluorescence and why does it interfere with HTS assays?
Compound autofluorescence occurs when test chemicals themselves emit light upon excitation, creating background signals not related to the biological activity being measured. This interference is particularly problematic in high-throughput screening because it can generate false positive results or mask true biological signals [13] [10]. Autofluorescent compounds demonstrate reproducible, concentration-dependent activity that can be mistaken for genuine target engagement, especially when they associate with cellular structures or exhibit spectral properties overlapping with assay detection windows [10].
The mechanisms differ between fluorescence and luminescence-based assays. In fluorescence-based assays, interference primarily occurs through two mechanisms: quenching (where chemicals absorb light directly) and autofluorescence (where chemicals emit light that overlaps with the fluorophore spectrum) [5]. In luminescence assays, chemicals can interfere by inhibiting luciferase enzymatic activity or through direct oxidation of the luciferin substrate [5]. These interference mechanisms can significantly impact various detection technologies common in HTS environments, from simple fluorescence intensity measurements to complex high-content screening platforms.
How does autofluorescence differ from other types of signal interference like crosstalk?
While autofluorescence originates from the intrinsic properties of compounds or assay components, crosstalk represents a distinct form of signal interference caused by stray light between adjacent wells in a microplate [14]. In microplate readers, crosstalk occurs when light from surrounding wells reaches the detector while measuring a specific well, either by shining above the microplate to the detector or through the plastic wall of a well to adjacent samples [14].
The key distinction lies in their origins and mitigation strategies:
- Autofluorescence: Property of the sample itself; requires chemical quenching or spectral shifting
- Crosstalk: Artifact of plate reader optics and plate geometry; addressed through physical barriers or measurement sequencing
Crosstalk specifically affects luminescence assays and related technologies like AlphaScreen and AlphaLISA because these methods generate intense, prolonged luminous signals [14]. Fluorescence intensity assays are generally less susceptible to crosstalk because emission occurs only after excitation and typically has a very short lifetime [14].
Troubleshooting Guides
How can I identify autofluorescence in my screening assay?
Autofluorescence can be detected through several methodological approaches:
Statistical Analysis of Fluorescence Intensity Data: Compound interference due to autofluorescence often produces values that are statistical outliers relative to the normal distribution ranges in control wells not exposed to compounds [13].
Counter-Screens and Orthogonal Assays: Implement target-free or reporter-only assays specifically designed to detect interference. The Tox21 consortium developed dedicated assays for luciferase inhibition and autofluorescence across multiple wavelengths (red, blue, green) under various conditions (cell-free and cell-based) [5].
Control Experiments: Always perform endogenous tissue controls (no primary or secondary antibody) and primary antibody controls (just secondary antibody) to reveal the level of autofluorescence and non-specific binding in your experiments [12].
Concentration-Response Analysis: Autofluorescence typically demonstrates concentration-dependent effects, which can be characterized through Hill equation fitting of concentration-response curves [5].
Image Review: For high-content screening, manually review images to identify unusual fluorescence patterns that might indicate autofluorescence [13].
What strategies can I use to reduce autofluorescence interference?
Multiple strategies exist for mitigating autofluorescence, which can be implemented at various stages of assay development and execution:
Table: Strategies for Reducing Autofluorescence Interference
| Strategy Category | Specific Approaches | Application Context |
|---|---|---|
| Assay Design | Use red and far-red shifted fluorophores [12] | All fluorescence-based assays |
| Implement time-resolved fluorescence measurements [10] | Particularly effective for compound fluorescence | |
| Use ratiometric fluorescence outputs [10] | Cell-based and biochemical assays | |
| Include a pre-read after compound addition but prior to fluorophore addition [10] | High-throughput screening | |
| Sample Processing | Treat with autofluorescence quenchers (Sudan Black B, TrueVIEW, etc.) [15] [12] | Fixed cells and tissues |
| Perfuse tissues with PBS prior to fixation to remove red blood cells [12] | Tissue imaging studies | |
| Optimize fixation (use EtOH instead of aldehydes, minimize fixation time) [12] | Histology and cell-based imaging | |
| Experimental Controls | Include interference counter-screens [5] [10] | High-throughput screening campaigns |
| Use reference interference compounds for validation [13] | Assay development and optimization | |
| Data Analysis | Apply computational autofluorescence correction algorithms [5] | Post-acquisition data processing |
| Use statistical outlier detection methods [13] | Hit identification |
The following workflow illustrates a systematic approach to identifying and mitigating autofluorescence in HTS:
How can I minimize crosstalk between fluorescence channels in multiplexed assays?
For multispectral fluorescence analysis, particularly in high-throughput droplet microfluidics, crosstalk between channels due to spectral overlap can significantly limit resolution [16]. The Modulated Excitation-Synchronous Acquisition (MESA) method provides an effective solution by:
- Sequential Modulation: Using multiple laser beams that are selectively and sequentially excited at high frequency (~100 kHz) via acousto-optic modulators [16]
- Synchronized Acquisition: Employing an FPGA-based data acquisition algorithm synchronized with the modulation signal to acquire emission signals only from the fluorescence channel corresponding to the excitation wavelength in each time window [16]
- Temporal Separation: Ensuring only a single laser and its corresponding photomultiplier tube (PMT) is active at any given time, eliminating crosstalk components from spectral overlap [16]
This approach has demonstrated >97% reduction in crosstalk between channels and can resolve fluorescence populations that are indistinguishable with conventional continuous wave excitation methods [16].
Experimental Protocols
Protocol: Autofluorescence Quenching in Fixed Cells and Tissues
This protocol is adapted from methods used in myocardial tissue studies [15] and general immunofluorescence best practices [12].
Materials Needed:
- TrueVIEW Autofluorescence Quenching Kit (Vector Laboratories) OR
- Sudan Black B (0.1% in 70% ethanol) OR
- Other quenchers: Glycine, Trypan Blue, TrueBlack [15]
- Phosphate-buffered saline (PBS)
- Mounting medium
- Standard fluorescence microscopy supplies
Procedure:
- Complete standard immunofluorescence staining following your established protocol for fixation, permeabilization, and antibody incubation.
Prepare quenching solution:
- For TrueVIEW: Prepare according to manufacturer's instructions
- For Sudan Black B: Prepare 0.1% solution in 70% ethanol and filter before use
- For other quenchers: Use recommended concentrations from literature
Apply quenching solution to cover the entire sample and incubate:
- TrueVIEW: 5-10 minutes at room temperature
- Sudan Black B: 10-20 minutes at room temperature
- Other quenchers: Optimize based on reference protocols
Wash thoroughly with PBS (3 × 5 minutes) to remove excess quenching solution
Mount slides using an anti-fade mounting medium
Image samples using standard fluorescence microscopy techniques
Technical Notes:
- Optimization of quenching time may be necessary for different tissue types
- Sudan Black B fluoresces in the far-red channel, which must be considered when planning multiplex panels [12]
- Test multiple quenchers to identify the most effective for your specific application [15]
Protocol: Luciferase Interference Counter-screen
This protocol follows the quantitative HTS approach used by the Tox21 consortium to identify luciferase inhibitors [5].
Materials Needed:
- Firefly luciferase (commercially available)
- D-Luciferin substrate
- White opaque 1536-well plates
- Compound library for screening
- Luminescence plate reader
Procedure:
- Prepare reaction mixture containing:
- 50 mM Tris-acetate pH 7.6
- 13.3 mM magnesium acetate
- 0.01 mM D-luciferin
- 0.01 mM ATP
- 0.01% Tween-20
- 0.05% BSA
Dispense 3 μL of substrate mixture into white 1536-well plates
Transfer test compounds (23 nL) to assay plates using pintool station
- Include DMSO controls and reference inhibitor controls (e.g., PTC-124)
Add 1 μL of 10 nM firefly luciferase to all wells except controls
Incubate 5 minutes at room temperature
Measure luminescence intensity using a Viewlux plate reader or equivalent
Analyze data by fitting concentration-response curves to the Hill equation to determine IC50 values and efficacy [5]
Technical Notes:
- Screen compounds in triplicate concentration response (15 concentrations recommended)
- Classify concentration-response curves based on quality of fit and response efficacy [5]
- Consider including non-ionic detergents like Triton X-100 (0.01-0.1%) to reduce aggregation-based inhibition [10]
Research Reagent Solutions
Table: Essential Reagents for Managing Autofluorescence
| Reagent Name | Primary Function | Application Notes |
|---|---|---|
| TrueVIEW Autofluorescence Quenching Kit | Reduces autofluorescence from multiple causes including aldehyde fixation and endogenous pigments [12] | Compatible with various tissue types; includes ready-to-use solution |
| Sudan Black B | Lipophilic dye that effectively eliminates lipofuscin autofluorescence [15] [12] | Fluoresces in far-red channel; use 0.1% in 70% ethanol |
| Sodium Borohydride | Reduces formalin-induced autofluorescence by breaking down Schiff bases [12] | Variable effectiveness; can be optimized for specific tissues |
| Anti-fluorescence Attenuation Sealing Agent | Specialized sealing agent to control and minimize interference from fluorescent signals [17] | Used in fluorescence microscopy applications |
| CUBIC (Clear, Unobstructed Brain/Body Imaging Cocktails) | Tissue clearing reagent that improves light penetration and reduces scattering [15] | Particularly useful for 3D imaging of thick samples |
| TrueBlack | Lipofuscin quenching dye [15] | Shows trends of reduced imaging depth in some tissues |
| Triton X-100 | Non-ionic detergent that reduces aggregation-based inhibition [10] | Use at 0.01-0.1% in assay buffers |
FAQs
What are the most common chemical features associated with compound autofluorescence?
While comprehensive structure-activity relationships for autofluorescence are still being developed, some chemical classes are known to be problematic. Previous approaches have relied on identifying chemicals with particular substructures as interferents, such as thiol or quinone substructures [5]. The Tox21 program has applied machine learning algorithms to predict assay interference based on molecular descriptors and chemical properties, with the best performing models (accuracies of ~80%) incorporated into a web-based tool called InterPred that allows users to predict the likelihood of assay interference for any new chemical structure [5].
How prevalent is compound autofluorescence in typical screening libraries?
The prevalence of autofluorescence depends on the spectral range being examined and the composition of the compound library. In the Tox21 library of 8,305 environmentally relevant chemicals, percent actives in interference assays ranged from 0.5% (red autofluorescence) to 9.9% (luciferase inhibition) [5]. More general analyses of screening libraries indicate that autofluorescence affects varying percentages of compounds depending on the excitation/emission wavelengths: ~2-5% at EX340nm/EM450nm, ~0.01-0.2% at EX480nm/EM540nm, and progressively lower percentages at longer wavelengths [10]. This highlights the advantage of using red and far-red shifted fluorophores when possible [12].
What is the difference between counter-screens and orthogonal assays?
These terms represent distinct approaches for addressing assay interference:
Counter-screen: A screen performed in parallel with or after the primary screen specifically designed to identify compounds that have the potential to interfere with the primary assay [10]. An example would be a biochemical assay to identify compounds that inhibit firefly luciferase, used as a counter-screen to a primary screen that utilized firefly luciferase as a reporter [10].
Orthogonal assay: An assay performed following the primary assay that uses a different reporter or assay format to confirm that compound activity is directed toward the biological target of interest rather than being assay format-dependent [10].
How effective are computational approaches for predicting autofluorescence?
Computational prediction of autofluorescence has shown promising results. Multiple machine learning algorithms applied to predict assay interference based on molecular descriptors and chemical properties have achieved accuracies of approximately 80% [5]. These models have been incorporated into web-based tools like InterPred that allow researchers to predict the likelihood of assay interference for new chemical structures before conducting experimental work [5]. These in silico tools represent a valuable resource for prioritizing compounds for screening and minimizing interference-related artifacts.
Chemical Structures and Promiscuous Substructures Linked to Interference
Frequently Asked Questions (FAQs)
1. What are the main types of assay interference in HTS? The two primary mechanisms are chemical assay interference and chemical reactivity interference [5] [18].
- Chemical Assay Technology Interference: This occurs when a compound directly interferes with the assay's detection technology. Common examples include:
- Luciferase Inhibition: The compound inhibits the firefly luciferase enzyme, reducing the luminescent signal [5].
- Autofluorescence: The compound itself fluoresces, emitting light that overlaps with the fluorophore's spectrum and creates a false signal [5].
- Fluorescence Quenching: The compound absorbs the light used to excite the fluorophore, reducing the detectable emitted light [5].
- Chemical Reactivity Interference: This involves non-specific chemical reactions between the test compound and assay reagents or protein residues. Common reactions include Michael addition, nucleophilic aromatic substitution, and disulfide formation with cysteine residues [18].
2. What are PAINS and how should they be used? PAINS (Pan-Assay Interference Compounds) are defined substructural motifs that have been associated with promiscuous behavior in certain assay technologies, particularly AlphaScreen [19] [20]. However, their application requires caution. Using them as a strict filter to eliminate compounds can be detrimental, especially in phenotypic screens, as it may remove potentially valuable "privileged structures" or "molecular master keys" that act on target families [20]. PAINS should be used as an alert for further investigation, not as an automatic triage tool [20].
3. How can I experimentally identify interference compounds? The most direct method is to use counter-screens (or artefact assays) [19]. These are assays that contain all the components of the primary screen but lack the biological target. A compound that is active in the primary screen but also shows activity in the counter-screen is likely interfering with the assay technology itself [19]. For reactivity, experimental probes like glutathione (GSH) or dithiothreitol (DTT) can be used to detect compounds that react with thiols [18].
4. Are there computational tools to predict interference? Yes, machine learning models have been developed to predict interference. For instance, the InterPred web tool uses molecular descriptors to predict the likelihood of luciferase inhibition or autofluorescence with ~80% accuracy [5]. Other models, like random forest classifiers, have also been built to predict technology interference for assays like AlphaScreen, FRET, and TR-FRET [19].
5. Does interference only occur in cell-free, target-based assays? No. While the mechanisms are often discussed in the context of biochemical assays, cell-based and phenotypic assays are also susceptible to interference. A classic example is PTC124, which was initially identified in a firefly luciferase-based cellular assay but was later found to stabilize the reporter enzyme, confounding the readout [18].
Troubleshooting Guide: Identifying and Mitigating Interference
| Symptom | Possible Cause | Recommended Action |
|---|---|---|
| High hit rate in primary screen with non-specific curve patterns | Chemical assay technology interference (e.g., autofluorescence, luciferase inhibition) | Run a target-free counter-screen; analyze structures for known interferring motifs; use a different assay technology for confirmation [5] [19] |
| Inconsistent or irreproducible Structure-Activity Relationships (SAR) | Chemical reactivity; compound aggregation; impurity | Perform a thiol-reactivity probe assay (e.g., with GSH or DTT); check compound purity and stability; use detergent to disrupt aggregates [18] |
| A hit contains a PAINS substructure alert | Potential for promiscuous interference or genuine polypharmacology | Do not automatically discard. Investigate the hit in counter-screens and secondary, orthogonal assays to confirm the mechanism of action [20] |
| Activity is lost when switching from a biochemical to a cell-based assay | Poor cellular permeability; compound is unstable in cellular environment; interference was specific to the first assay format | Check compound physicochemical properties (e.g., LogP); assess cellular permeability; confirm activity with an orthogonal cellular assay [18] |
Quantitative Data on Assay Interference
Table 1: Prevalence of Interference in the Tox21 Library (8,305 chemicals) [5] This table summarizes the percentage of active compounds found in specific interference assays, providing a benchmark for HTS campaigns.
| Interference Type | Assay System | Wavelength / Condition | Percentage of Actives |
|---|---|---|---|
| Luciferase Inhibition | Cell-free | N/A | 9.9% |
| Autofluorescence | HEK-293 & HepG2 (Cell-based & cell-free) | Blue | 4.2% |
| Autofluorescence | HEK-293 & HepG2 (Cell-based & cell-free) | Green | 3.3% |
| Autofluorescence | HEK-293 & HepG2 (Cell-based & cell-free) | Red | 0.5% |
Table 2: Common Reactive Moieties and Interfering Substructures [18] This table lists structural features often linked to assay interference through chemical reactivity or other non-specific mechanisms.
| Structural Class | Example Functional Groups | Presumed Mechanism of Interference |
|---|---|---|
| Electrophiles / Covalent Modifiers | Acid halides, aldehydes, epoxides, α-halo carbonyls | Covalent modification of protein residues (Cys, Lys, etc.) [18] |
| PAINS Substructures | Rhodanines, enones, curcuminoids, isothiazolones | Chemical reactivity, metal chelation, or aggregation [18] |
| Redox-Active Compounds | Quinones, catechols | Oxidation or reduction of assay components or protein residues [18] |
| Aromatic/Conjugated Systems | Extended polyaromatics | Autofluorescence; compound aggregation [5] |
Experimental Protocols
Protocol 1: Luciferase Inhibition Counter-Screen (Biochemical qHTS) [5]
Objective: To identify compounds that inhibit firefly luciferase enzyme activity. Key Reagents:
- D-Luciferin (substrate)
- Firefly Luciferase (enzyme)
- Assay Buffer: 50 mM Tris-acetate pH 7.6, 13.3 mM magnesium acetate, 0.01 mM D-luciferin, 0.01 mM ATP, 0.01% Tween, 0.05% BSA.
- Positive Control: PTC-124
Methodology:
- Dispense 3 µL of the substrate mixture into a 1,536-well plate.
- Transfer 23 nL of test compounds or controls (DMSO, PTC-124) to the assay plate.
- Add 1 µL of 10 nM firefly luciferase enzyme solution to all wells except designated background control wells (which receive buffer only).
- Incubate the plate at room temperature for 5 minutes.
- Measure luminescence intensity using a plate reader.
- Data Analysis: Fit concentration-response data to the Hill equation to determine IC~50~ and efficacy values. Compounds showing significant inhibition are classified as luciferase interferers.
Protocol 2: Autofluorescence Counter-Screen (Cell-Based and Cell-Free) [5]
Objective: To identify compounds that autofluoresce at common wavelengths. Key Reagents:
- Cell lines: HEK-293 or HepG2 cells (for cell-based), or cell culture medium only (for cell-free).
- Assay plates: 1,536-well plates.
Methodology:
- Cell-based: Seed cells in assay plates. For cell-free controls, use culture medium only.
- Add test compounds in a concentration-response series.
- Incubate under standard cell culture conditions (for cell-based).
- Measure fluorescence intensity at multiple wavelengths (e.g., red, blue, green) using a plate reader.
- Data Analysis: Identify compounds that produce a fluorescent signal in the absence of the assay's fluorophore. Compare signals in cell-based vs. cell-free conditions to assess if cellular components modulate the interference.
Experimental Workflow for Interference Investigation
Computational Prediction of Interference
The Scientist's Toolkit: Key Research Reagent Solutions
Table 3: Essential Reagents for Interference Testing
| Reagent | Function/Biological Target | Explanation of Use |
|---|---|---|
| Firefly Luciferase & D-Luciferin | Luciferase inhibition counter-screen | The core components for a biochemical assay to identify compounds that inhibit the luminescence reaction, a common source of false positives in reporter gene assays [5]. |
| Thiol-based Probes (GSH, DTT, BME) | Chemical reactivity detection | Used in experimental assays to detect compounds that act via covalent modification. Reaction with these probes suggests non-specific reactivity toward protein cysteine residues [18]. |
| HEK-293 & HepG2 Cell Lines | Autofluorescence counter-screen | These cell lines are used in cell-based autofluorescence assays to measure compound interference under physiologically relevant conditions and in cell-free medium to isolate the signal [5]. |
| Detergents (e.g., Tween-20) | Disrupting compound aggregation | Added to assay buffers to prevent the formation of compound aggregates, which can non-specifically inhibit enzymes and cause false positives [18]. |
The Clinical and Research Costs of False Positives and Negatives
In high-throughput screening (HTS) and drug development, the accuracy of experimental results is paramount. False positives (incorrectly identifying an ineffective treatment as effective) and false negatives (failing to identify a truly effective treatment) represent two sides of the same problematic coin, each with significant but distinct consequences for research efficiency, clinical outcomes, and economic sustainability. False positives can lead research down unproductive paths, wasting precious resources on dead-end compounds, while false negatives can cause promising therapeutic opportunities to be prematurely abandoned. Within the context of addressing assay interference in HTS research, understanding, identifying, and mitigating the sources of these errors is a fundamental competency for researchers, scientists, and drug development professionals. This technical support center provides actionable troubleshooting guides and FAQs to directly address the specific issues you might encounter in your experiments.
The Economic Impact of Error
Statistical errors in clinical development translate directly into substantial financial costs and lost opportunities. The following table summarizes the cost implications of false positives and false negatives across different domains.
Table 1: Comparative Costs of False Positives and False Negatives
| Domain | Error Type | Estimated Cost/Financial Impact | Primary Consequences |
|---|---|---|---|
| Drug Development (Clinical Trials) | False Negative | Loss of effective treatments; ~60% lower productivity with underpowered Phase II trials [21] | Missed healthcare opportunities; loss of associated commercial profits [21] |
| False Positive | Expensive follow-up testing; exposure to unnecessary risks; costly delays [21] | Inefficient resource allocation; investment in ineffective treatments [21] | |
| Diagnostic Testing (Mammography) | False Positive | ~$503 additional per patient in breast-care services post false-positive mammogram [22] | Unnecessary imaging, consultations, and biopsies; patient anxiety [22] |
| Toxicity Regulation | False Negative (Highly toxic chemical misclassified as safe) | Massive health costs (c~100×net benefit); public health harm [23] | Unregulated production of a dangerous substance [23] |
| False Positive (Safe chemical misclassified as toxic) | Loss of net social benefit (b(q~m~)) [23] | Unnecessary restriction or ban of a beneficial chemical [23] |
The burden of false negatives in drug development is particularly severe. Simulation studies have shown that increasing the statistical power of typically underpowered Phase II trials from 50% (the status quo) to 80% can lead to a 60.4% increase in productivity and a 52.4% increase in profit, as more truly effective treatments successfully advance through the pipeline. The additional costs incurred by the larger sample sizes required for higher power are offset by the dramatic increase in successful outcomes [21].
Troubleshooting Guides and FAQs
Frequently Asked Questions
Q1: Our HTS campaign is yielding an unusually high hit rate. What are the most common causes of false positives in an assay?
- A: A high hit rate often signals assay interference. Common causes include:
- Compound Fluorescence or Luminescence: Test compounds can directly interfere with the detection signal.
- Aggregation-Based Inhibition: Compounds forming colloidal aggregates can non-specifically inhibit enzymes.
- Chemical Reactivity: Compounds acting as chemical reactives rather than specific inhibitors.
- Contamination: Airborne contaminants from concentrated proteins, sera, or cell culture media can lead to false elevations in analyte levels. Always use aerosol barrier tips and work in clean, dedicated areas [24].
- Inadequate Washing: Incomplete washing of ELISA plates can cause carryover of unbound reagent, leading to high and variable background signals (non-specific binding) [24].
- A: A high hit rate often signals assay interference. Common causes include:
Q2: We suspect a promising compound from our screen is a false positive. What key experiments should we perform to confirm this?
- A: To triage potential false positives, implement these confirmatory assays:
- Dose-Response Confirmation: A true active compound will typically show a sigmoidal dose-response curve. A shallow or irregular curve may indicate interference.
- Orthogonal Assay: Test the compound in a different assay format that uses an alternative detection technology (e.g., switch from a fluorescence-based to a luminescence or AlphaScreen-based assay).
- Counter-Screens: Run the compound against unrelated targets or anti-target assays to assess specificity.
- Add Detergents: Including non-ionic detergents like Triton X-100 or Tween-20 can disrupt compound aggregates, eliminating the signal of this common false-positive class.
- A: To triage potential false positives, implement these confirmatory assays:
Q3: What are the primary contributors to false negatives in a screening assay?
- A: False negatives, where true actives are missed, are often caused by:
- Insufficient Assay Signal Window: A low Z'-factor (<0.5) indicates a small dynamic range between positive and negative controls, making it difficult to distinguish a true signal from background noise [25].
- Suboptimal Compound Solubility or Stability: The compound may precipitate or degrade under assay conditions.
- Incorrect Assay pH or Ionic Strength: The conditions may be outside the optimal range for the target-compound interaction.
- Inadequate Statistical Power: Underpowered experiments, often due to small sample sizes, are a major source of false negatives in early-phase trials, leading to effective treatments being wrongly eliminated [21].
- A: False negatives, where true actives are missed, are often caused by:
Q4: Our ELISA results show poor precision between duplicates and high background. What should I check first?
- A: This pattern strongly suggests contamination.
- Technique: Ensure you are not talking or breathing over an uncovered microtiter plate. Consider pipetting in a laminar flow hood [24].
- Reagents: Check if pipettes or automated plate washers have been contaminated with concentrated sources of the analyte. Use dedicated equipment where possible [24].
- Washing: Review your washing technique. Use only the recommended wash buffer and ensure complete aspiration between washes without allowing wells to dry out [24].
- A: This pattern strongly suggests contamination.
Q5: How can I optimize my assay to minimize both types of error from the start?
- A: Proactive assay validation is key. This includes:
- Plate Uniformity Assessment: Run 3-day interleaved-signal format studies to establish signal stability and adequate separation between "Max," "Min," and "Mid" controls [25].
- Reagent Stability Testing: Determine the stability of all critical reagents under storage and assay conditions, including freeze-thaw cycles [25].
- DMSO Compatibility: Test the tolerance of your assay to the DMSO concentrations used for compound storage [25].
- Statistical Validation: Calculate the Z'-factor to quantitatively assess the assay's robustness and suitability for HTS [25].
- A: Proactive assay validation is key. This includes:
Experimental Protocols for Key Validation Experiments
Protocol 1: Plate Uniformity and Signal Variability Assessment
This protocol is essential for establishing the robustness of an HTS assay before a full screen is initiated [25].
- Objective: To assess the stability, variability, and separation of assay signals over multiple days and plates.
- Plate Layout (Interleaved-Signal Format):
- Use a statistically designed layout with "Max" (maximum signal), "Min" (background signal), and "Mid" (mid-point signal) controls distributed across the entire plate.
- Example 384-well layout: Pattern rows with repeated sequences of H (Max), M (Mid), L (Min) across all columns [25].
- Use the same plate format on all days of the test.
- Procedure:
- Run the assay independently over three separate days using freshly prepared reagents each day.
- On each day, run multiple plates (e.g., 3-5 plates) to assess inter-plate and intra-plate variability.
- Do not change the concentrations producing the mid-point signal over the course of the test.
- Data Analysis:
- Calculate the Z'-factor for each plate: Z' = 1 - [3*(σ~p~ + σ~n~) / |μ~p~ - μ~n~| ], where σ~p~ and σ~n~ are the standard deviations of the positive and negative controls, and μ~p~ and μ~n~ are their means.
- An assay is generally considered excellent for HTS if Z' > 0.5.
- Analyze signal-to-background (S/B) ratios and coefficient of variation (CV) for all controls.
Protocol 2: Investigating Hemolysis Interference in a Biochemical Assay
This protocol assesses the impact of a common biological interferent [26].
- Objective: To determine the effect of in vitro hemolysis on the accuracy of an assay result.
- Sample Preparation:
- Prepare a hemolysate by freezing and thawing packed red blood cells several times, followed by centrifugation to remove debris.
- Spike the hemolysate into a pooled serum sample at a series of volumes to create a range of hemoglobin concentrations (e.g., 0, 0.1, 0.5, 1.0, 2.0 g/L).
- Prepare corresponding control samples spiked with an equal volume of saline.
- Procedure:
- Run the target assay on all spiked samples and controls in duplicate.
- Measure the hemoglobin concentration in each spiked sample spectrophotometrically to confirm the level of hemolysis.
- Data Analysis:
- Calculate the percentage recovery for each hemolyzed sample: (Result~hemolyzed~ / Result~control~) * 100%.
- A significant change (e.g., >10%) from the baseline recovery at a specific hemoglobin concentration indicates interference. This defines the maximum acceptable level of hemolysis for the assay.
The Scientist's Toolkit: Research Reagent Solutions
The following table lists essential materials and their functions for developing and troubleshooting robust assays.
Table 2: Key Research Reagent Solutions for Assay Development and Troubleshooting
| Item | Function/Application | Key Considerations |
|---|---|---|
| Validated Antibody Pairs | High-specificity capture and detection in immunoassays (e.g., ELISA). | Reduces non-specific binding and cross-reactivity, minimizing false positives [27]. |
| Multiplex Syndromic Panels (e.g., GPP) | Simultaneous detection of multiple pathogens or analytes from a single sample. | Improves efficiency and can reduce false positives via built-in controls and highly specific barcoded magnetic bead technology [27]. |
| High-Quality Cell Lines | Consistent, physiologically relevant cell-based assays. | Use low-passage, authenticated lines to minimize genetic drift and contamination, a source of variable results. |
| Assay-Specific Diluent | Diluting samples to bring them within the analytical range of the assay. | Validated to match the standard matrix; prevents adsorptive losses and dilutional artifacts that cause inaccurate recovery [24]. |
| Stable, Luminescent/Chemiluminescent Substrates | Signal generation with high sensitivity and broad dynamic range. | Less susceptible to compound interference (color, fluorescence) than colorimetric substrates. |
| Automated Liquid Handling Systems | Precise, reproducible reagent dispensing across microtiter plates. | Minimizes well-to-well and plate-to-plate variability caused by manual pipetting errors. |
Visualizing Workflows and Relationships
Assay Validation and Interference Investigation Workflow
The following diagram outlines a logical pathway for validating an assay and systematically investigating suspected interference, incorporating key experiments and decision points.
Statistical Decision Errors and Their Impacts
This diagram clarifies the logical relationship between statistical truth, experimental decisions, and the resulting outcomes of false positives and false negatives.
Advanced Detection and Proactive Prediction of Interfering Compounds
Frequently Asked Questions
What are technology interference artifacts, and why are they a problem in HTS/HCS? Technology interference artifacts are false signals caused by a compound's intrinsic physicochemical properties, not its biological activity. In High-Throughput Screening (HTS) and High-Content Screening (HCS), these artifacts can produce false positives or false negatives, leading to wasted resources pursuing invalid leads or missing genuine hits. Common interference mechanisms include compound autofluorescence, fluorescence quenching, light absorption by colored compounds, and chemical reactions with assay reagents [13] [28].
How can I quickly check if my hit compounds are autofluorescent? A primary method is to perform a plate-based fluorescence scan. Place hit compounds in an assay plate at the working concentration and measure the fluorescence signal using the same excitation and emission wavelengths as your primary assay, but in the absence of the fluorescent reporter or detection reagent. Signals significantly above the background (vehicle control) indicate autofluorescence [13].
My primary assay is a fluorescence-based readout. What is a robust orthogonal assay I can use? A highly effective orthogonal assay uses a different detection technology. For example, if your primary assay is fluorescence-based, consider switching to a luminescence, absorbance, or label-free method like Surface Plasmon Resonance (SPR) or Mass Spectrometry (MS) [28]. These methods are immune to optical interferences that plague fluorescence assays.
What does a "counter-screen" actually screen against? A counter-screen is designed to identify compounds that are active due to an interfering mechanism. It typically replicates the conditions of the primary assay but removes the critical biological component (e.g., the target protein, enzymes, or cells). If a compound is active in both the primary screen and this biologically null counter-screen, its activity is likely artifactual [13] [28].
When should I implement counter-screens in my workflow? Counter-screens are most efficiently deployed during the hit confirmation stage, immediately after the primary HTS/HCS. Applying them to all primary hits helps triage artifacts before investing in more resource-intensive secondary assays and lead optimization [28].
Troubleshooting Guides
Problem 1: Suspected Compound Autofluorescence or Quenching
Symptoms: Unusually high or low fluorescence signal in the primary assay; signal intensity that does not follow expected pharmacological response curves [13].
Solution: Perform a fluorescence profiling counter-screen.
Experimental Protocol:
- Prepare compound plates: Dispense hit compounds and controls into a microplate at the same concentration used in the primary assay.
- Acquire fluorescence signals: Using your HTS reader or imager, measure the fluorescence intensity of the compounds alone (without any biological system or fluorescent probes) at all excitation/emission wavelengths used in your primary assay and other common wavelengths.
- Analyze data: Compounds showing a signal greater than three standard deviations from the vehicle control mean (DMSO or buffer) are flagged as autofluorescent. Compounds that significantly depress the signal of a known fluorescent control are flagged as quenchers [13].
Problem 2: Suspected Compound-Mediated Cytotoxicity or Altered Morphology
Symptoms: In cell-based HCS, a significant reduction in cell count, abnormal nuclear morphology, or failure of image analysis algorithms to segment cells properly [13].
Solution: Implement a cell viability and morphology counter-screen.
Experimental Protocol:
- Seed cells: Plate the same cell line used in the primary assay in a microplate.
- Treat with compounds: Add hit compounds and controls. Include a cytotoxic agent as a positive control.
- Stain and image: After the assay incubation period, stain cells with a live-cell nuclear dye (e.g., Hoechst 33342) and a viability marker (e.g., propidium iodide). Acquire images.
- Analyze data: Extract and analyze these parameters:
- Total nuclear count: A significant decrease indicates cell death or detachment.
- Nuclear intensity/texture: Changes can indicate apoptosis or necrosis.
- Cell count per field: A sharp drop suggests cytotoxicity [13].
- Compare these results to the primary assay's phenotype to determine if the primary effect is secondary to cell death.
Problem 3: Confirming Specific Target Engagement
Symptoms: A compound is active in a phenotypic screen, but the mechanism of action is unclear, or off-target effects are suspected.
Solution: Develop a target-specific orthogonal assay.
Experimental Protocol:
- Choose an orthogonal technology: If the primary screen was image-based (HCS), a biochemical assay like SPR or a luminescence-based enzymatic assay can be ideal [28].
- Design the assay: The assay should directly measure binding or modulation of the specific target protein.
- For SPR, the target protein is immobilized on a chip, and compound binding is measured in real-time without labels [28].
- For an enzymatic assay, use a different readout (e.g., luminescence) to measure the target enzyme's activity in the presence of the compound.
- Validate hits: Compounds that confirm activity in this orthogonal, target-based assay have a higher probability of genuine target engagement.
Data Presentation: Key Assay Quality Metrics
When developing and running counter-screens, monitoring these statistical metrics ensures data reliability and robustness [28].
Table 1: Key QC Metrics for Assay and Counter-Screen Validation
| Metric | Formula/Description | Ideal Value | Purpose | ||
|---|---|---|---|---|---|
| Z'-factor | ( 1 - \frac{3(\sigmap + \sigman)}{ | \mup - \mun | } ) | > 0.5 | Measures the assay's signal window and robustness, where ( \sigma ) is the standard deviation and ( \mu ) is the mean of positive (p) and negative (n) controls [28]. |
| Signal-to-Background (S/B) | ( \frac{\mup}{\mun} ) | >> 1 | Indicates the strength of the assay signal compared to the background noise [28]. | ||
| Coefficient of Variation (CV) | ( \frac{\sigma}{\mu} \times 100\% ) | < 10% | Measures the variability of the positive and negative control signals; lower is better [28]. |
The Scientist's Toolkit: Essential Reagents & Materials
Table 2: Key Research Reagent Solutions for Counter-Screening
| Item | Function in Counter-Screening |
|---|---|
| Fluorescent Dyes (e.g., Hoechst, Propidium Iodide) | To stain nuclei and assess cell viability and count in cytotoxicity counter-screens [13]. |
| Label-Free Detection Kits (e.g., SPR Chips) | For orthogonal binding assays that are unaffected by optical interference from compounds [28]. |
| Cellular Viability Assay Kits (Luminescence-based) | To measure ATP levels as an orthogonal method to confirm cell health without fluorescence [28]. |
| Validated Inhibitor/Agonist Controls | Known modulators of your target or of interference mechanisms (e.g., a known cytotoxic compound) to serve as robust controls [13]. |
| Compound Management Solutions (DMSO) | High-quality, sterile DMSO for compound storage and dilution to prevent precipitation and degradation that can cause artifacts [13]. |
Experimental Workflow Visualization
The following diagram illustrates a logical workflow for triaging hits from a primary screen using targeted counter-screens to isolate and eliminate technology interference.
Hit Triage Workflow
Mechanism of Interference Visualization
This diagram breaks down the major categories of compound-mediated interference that counter-screens are designed to detect.
Interference Mechanisms
Leveraging Machine Learning and QSAR Models for Interference Prediction
FAQs: Fundamental Concepts
What is assay interference in High-Throughput Screening (HTS) and why is it problematic? Assay interference occurs when test compounds produce false signals in screening assays without any true biological activity. In HTS, which often relies on fluorescence or luminescence-based readouts, this is a major concern. Compounds can interfere by various mechanisms, such as autofluorescence (emitting light themselves), fluorescence quenching (absorbing light), or directly inhibiting reporter enzymes like luciferase. These interferents generate false positives or false negatives, wasting resources and potentially misleading research directions [13] [5].
How can computational models predict interference before running expensive experiments? Quantitative Structure-Activity Relationship (QSAR) models mathematically link a chemical compound's structure to its properties or activity—in this case, its potential to cause assay interference. These models use numerical representations of molecular structures (descriptors) and machine learning to identify patterns that distinguish interferents from non-interferents. By predicting the likelihood of interference for new chemical structures, researchers can prioritize compounds for testing, thereby increasing confidence in HTS data and reducing false positives [29] [5].
What types of assay interference can QSAR models predict? QSAR models can be trained to predict several specific types of interference, primarily:
- Luciferase Inhibition: Where compounds directly inhibit the firefly luciferase enzyme used in many reporter assays.
- Autofluorescence: Where compounds emit light at specific wavelengths (e.g., red, green, blue) under assay conditions, mimicking a positive signal [5]. Models like those developed by the Tox21 consortium can predict these interference mechanisms with high accuracy, providing a comprehensive profile for each compound [5].
Troubleshooting Guides
Issue 1: High False Positive Rate in Fluorescence-Based HTS
Problem: A significant number of hits from a primary screen are suspected to be fluorescent compounds that autofluoresce rather than genuine actives.
Solution:
- In Silico Triage: Use a pre-trained interference prediction tool like InterPred. Input the SMILES strings or structures of your hit compounds. The tool will provide a probability of each compound being a fluorescent interferent, allowing you to flag or deprioritize them for confirmation [5].
- Experimental Confirmation: For the remaining hits, implement an orthogonal assay that uses a different detection technology (e.g., switch from fluorescence intensity to luminescence or label-free detection) to confirm activity. This step is crucial for validating true biological effect [13].
- Counter-Screen: Run a dedicated autofluorescence counter-screen under identical conditions but without the biological target. This will directly identify compounds that produce a signal independent of the biology [13] [5].
Issue 2: Model Performance is Poor on New Chemical Series
Problem: A QSAR model for interference, built on a public dataset, performs poorly when applied to your company's proprietary chemical library.
Solution:
- Assess Applicability Domain: The new chemicals may lie outside the chemical space the original model was trained on. Use chemical similarity analysis to verify if your compounds are well-represented in the model's training set.
- Retrain with Domain-Specific Data: Fine-tune or rebuild the model by incorporating any internal historical screening data you have, even if it's limited. Transfer learning techniques can help adapt a general model to your specific chemical domain [30] [31].
- Curate High-Quality Data: Ensure your internal data is clean and standardized. The quality of the training data is often the most critical factor for a robust model. This involves removing duplicates, handling missing values, and using consistent units and experimental conditions [29] [32].
Issue 3: Integrating Predictive Models into an Existing HTS Workflow
Problem: Your team wants to use interference predictions but is unsure how to seamlessly incorporate them into the established screening pipeline.
Solution:
- Adopt a Tiered Screening Approach: Use the QSAR model as a first-pass filter.
- Step 1: Screen your entire virtual compound library in silico to predict interference.
- Step 2: Prioritize and purchase/test compounds predicted to have low interference risk for the experimental HTS.
- This reduces costs and increases the hit quality from the outset [30].
- Leverage High-Throughput Data: If you have existing HTS data, use it to train your own predictive models. For example, a published workflow used over 8,000 datapoints across 29 proteins and 44 resins to build a QSAR model that accurately predicts chromatographic behavior, effectively expanding the range of conditions considered without additional experiments [30].
- Automate with Scripting: Use Python or R scripts to automatically run new compound structures through pre-trained models (available in libraries like scikit-learn or RDKit) and append interference risk scores to your compound management database [33].
Experimental Protocols & Data
Protocol: Generating Data for an Interference QSAR Model
This protocol is adapted from the Tox21 consortium's high-throughput screening for chemical-assay interference [5].
Objective: To experimentally generate quantitative data on luciferase inhibition and autofluorescence for a library of chemicals to serve as a training set for QSAR modeling.
Materials:
- Compound Library: e.g., 8,305 unique chemicals from the Tox21 library.
- Reagents: D-Luciferin substrate, firefly-Luciferase enzyme (Sigma-Aldrich), cell culture media, HepG2 and HEK-293 cells (ATCC).
- Equipment: 1,536-well white/solid plates (Greiner Bio-One), Flying Reagent Dispenser (FRD), Pintool station (Wako), Viewlux plate reader (Perkin Elmer).
Methodology:
- Luciferase Inhibition Assay (Cell-Free):
- Dispense a luciferin substrate mixture into 1,536-well plates.
- Transfer compounds and controls (e.g., PTC-124 as a positive control) to the assay plates using a Pintool.
- Add the firefly-luciferase enzyme solution to all wells except designated background control wells.
- Incubate for 5 minutes at room temperature.
- Measure luminescence intensity.
- Autofluorescence Assay (Cell-Based and Cell-Free):
- Culture HepG2 and HEK-293 cells in appropriate media.
- For cell-based assays, seed cells into plates. For cell-free controls, use culture medium only.
- Treat with the compound library across a range of concentrations.
- Measure fluorescence intensity at multiple wavelengths (red, green, blue) without using any fluorescent dyes.
Data Analysis:
- Fit concentration-response curves for each compound and assay endpoint.
- Calculate half-maximal inhibition concentrations (IC50) and maximal response (efficacy) values.
- Classify compounds as active (interferent) or inactive based on the curve fit and efficacy [5].
Quantitative Data on Assay Interference
The table below summarizes interference data from a large-scale screening effort, providing a benchmark for expected rates of interference.
Table 1: Prevalence of Assay Interference in a Diverse Chemical Library (n=8,305 compounds) [5]
| Interference Type | Assay Conditions | Active Compounds (%) |
|---|---|---|
| Luciferase Inhibition | Cell-free biochemical assay | 9.9% |
| Autofluorescence (Red) | Cell-based (HEK-293/HepG2) & cell-free | 0.5% |
| Autofluorescence (Green) | Cell-based (HEK-293/HepG2) & cell-free | 6.7% |
| Autofluorescence (Blue) | Cell-based (HEK-293/HepG2) & cell-free | 9.9% |
QSAR Model Performance Metrics
After generating training data, machine learning models can be built. The following table outlines the performance you can expect from well-constructed models.
Table 2: Performance Metrics for QSAR Models in Interference and Related Predictions
| Model Application | Algorithm | Key Performance Metric | Result | Source |
|---|---|---|---|---|
| Predicting Chromatographic Elution/Binding | Not Specified (Regression & Classification) | Classification Accuracy | 95% (elution), 93% (binding) | [30] |
| Predicting Assay Interference | Multiple Machine Learning Algorithms | Overall Prediction Accuracy | ~80% | [5] |
| General ADME QSAR Modeling | Random Forest | Test-set R² (coefficient of determination) | 0.7 (demonstrating good predictive power) | [33] |
The Scientist's Toolkit
Table 3: Essential Research Reagent Solutions for Interference Studies
| Item Name | Function / Description | Relevance to Interference Prediction |
|---|---|---|
| Firefly-Luciferase | Enzyme used in luciferase reporter assays. | Essential for running the luciferase inhibition counter-screen to generate experimental training data for models [5]. |
| D-Luciferin | Substrate for the firefly-luciferase enzyme. | Required for the luciferase inhibition assay protocol [5]. |
| HEK-293 & HepG2 Cells | Common mammalian cell lines used in cell-based assays. | Used in autofluorescence counter-screens under biologically relevant conditions to model cell-based interference [5]. |
| Transcreener ADP² Assay | A universal, biochemical HTS assay for detecting ADP formation. | An example of a robust, interference-resistant assay platform that uses multiple detection methods (FP, FI, TR-FRET) to minimize false positives, serving as a good orthogonal assay [34]. |
| RDKit | An open-source cheminformatics toolkit. | Used to calculate molecular descriptors (e.g., Morgan fingerprints) from chemical structures, which are the essential inputs for building QSAR models [29] [33]. |
| InterPred Web Tool | A web-based tool from the Tox21 consortium. | Allows users to input a new chemical structure and predict its likelihood of causing luciferase inhibition or autofluorescence based on pre-trained models [5]. |
Workflow Visualization
Integrated QSAR and HTS Workflow for Interference Mitigation
QSAR Model Development Pipeline
Frequently Asked Questions (FAQs)
1. What is a web-based predictor and how is it used in high-throughput screening? A web-based predictor is an online tool that allows researchers to input biological or chemical data to obtain predictions about interactions, activity, or potential interference. In high-throughput screening (HTS), these tools help scientists model interactions and identify potential issues before running physical experiments, saving time and resources. Users typically input data such as protein sequences or sample characteristics, and the server returns a prediction, such as the likelihood of an interaction or a correction factor for assay interference [35] [36].
2. I've received an error about a "buffer overflow" while using a prediction tool. What does this mean? A "buffer overflow" error typically occurs when the tool receives more data than it can process at one time [37]. This could be due to a lost connection, submitting an excessively large dataset, or the server being unable to handle the request queue. To resolve this, try reducing the size of your input data, ensure a stable internet connection, and resubmit your job. If the problem persists, check the tool's documentation for data size limits [37].
3. My experimental results do not match the predictions from the web server. What are possible causes? A common cause for this discrepancy is interference from your test samples in the assay itself [38]. The sample can cause detection interference through various mechanisms, such as light absorption, fluorescence quenching, chemical interaction with detection reagents, or even depression of the meniscus in the well [38]. It is recommended to run a separate artifact assay to measure and correct for this interference.
4. What does a "Degraded Performance Banner" on a web tool indicate? This message appears when the web server or your connection to it is experiencing network connectivity issues [39]. Check your local network coverage and location. If your connection is stable, the issue may be on the server side, and you may need to try accessing the tool again later [39].
5. The web tool requires a specific file format for input. What should I do? Most tools specify acceptable file formats (e.g., FASTA for sequences, CSV for data). If your data is in a different format, you may need to preprocess it. For instance, sequence data can often be converted using free online bioinformatics tools, and quantitative data can be reformatted using spreadsheet software. Always refer to the tool's "Tutorial" or "Help" section for detailed specifications [36].
Troubleshooting Guide
Common Issues and Solutions
| Problem | Possible Cause | Solution |
|---|---|---|
| Login Failure [39] | Incorrect credentials, expired subscription, or outdated application. | Verify your username (often your email) and password. Contact your organization's administrator to confirm an active subscription. Update the application or client software. |
| Incorrect Prediction Results [38] | Assay interference from test samples. | Perform a separate artifact assay to quantify the interference. Apply an arithmetic correction to your primary activity assay data. |
| Tool Not Accessible [39] | Network connectivity issues, server downtime, or incorrect URL. | Check your network connection. Verify the URL is correct. Check for any service announcements from the tool's provider. |
| Job Submission Error | Invalid input format or size, or server overload. | Ensure your input data conforms to the required format and size limits. Try resubmitting during off-peak hours. |
| Results Not Displaying [40] | Browser compatibility issue or missing plugin. | Try a different web browser (e.g., Chrome, Firefox). Ensure required browser plugins (like JavaScript) are enabled. |
Step-by-Step: Correcting for Assay Interference
A critical step in validating computational predictions is empirical testing in high-throughput assays. The following protocol details how to correct for interference caused by test samples, a common source of discrepancy between prediction and experimental results [38].
Objective: To measure and correct for interference caused by test samples in a high-throughput biochemical assay.
Principle: Interference is measured in a separate, identical assay plate containing the test samples and detection reagents but lacking the key biochemical component. The measured interference values are then subtracted from the corresponding wells in the primary activity assay plate [38].
Materials Needed:
- Multiwell assay plates (e.g., 96-well or 384-well)
- Test samples
- Assay detection reagents (substrates, probes, etc.)
- Plate reader (compatible with absorbance, fluorescence, or luminescence detection)
- Liquid handling equipment
Procedure:
- Activity Assay Plate: Prepare your primary biochemical assay plate according to your standard protocol. This plate contains the test samples, detection reagents, and the biochemical system (e.g., enzyme, receptor).
- Artifact Assay Plate: Prepare a separate, identical plate that contains the test samples and detection reagents, but omits the key biochemical component of the system. This plate will measure interference originating solely from the test samples [38].
- Signal Measurement: Read both plates using your plate reader under the same conditions (e.g., wavelength, gain).
- Arithmetic Correction: Perform a well-by-well correction. Subtract the interference value measured in the artifact assay plate from the total signal measured in the corresponding well of the activity assay plate [38].
- Formula:
Corrected Activity = Signal (Activity Assay) - Signal (Artifact Assay)
- Formula:
Interpretation: The corrected values represent the true biochemical activity, free from the confounding effects of sample-specific interference. This leads to more reliable data for validating computational predictions [38].
Advanced Configuration: Integrating Prediction Tools with Local Data
For advanced users, many web-based predictors can be integrated into local analysis pipelines via Application Programming Interfaces (APIs). Common issues and solutions in such configurations are listed in the table below.
| Configuration Issue | Technical Description | Resolution Steps |
|---|---|---|
| API Connection Timeout | The local script fails to get a response from the predictor's server within a set time. | Increase the timeout threshold in your API call. Implement a retry mechanism with exponential backoff. Check the server's status page. |
| Invalid Data Format via API | The data sent by your script does not adhere to the API's required schema. | Validate the JSON or XML structure of your request against the API documentation. Ensure all mandatory fields are populated and data types are correct. |
| Authentication Failure | The API key or token provided is invalid, expired, or has insufficient permissions. | Regenerate the API key in your account settings on the predictor's website. Verify the key is being passed correctly in the request header. |
Research Reagent Solutions
The following table lists key materials and tools referenced for conducting and validating experiments with web-based predictors.
| Item | Function in Research |
|---|---|
| Multiwell Assay Plates | The standard platform for running high-throughput biochemical assays (e.g., 96, 384-well formats). |
| Artifact Assay | A separate control assay designed to measure interference caused by test samples, excluding the key biochemical component [38]. |
| Plate Reader | An optical instrument that measures absorbance, fluorescence, luminescence, or scintillation in multiwell plates to quantify assay results. |
| Web-Based Predictor (e.g., HMI-PRED) | A computational tool that uses algorithms (e.g., interface mimicry, machine learning) to predict interactions, such as between host and microbial proteins [35] [36]. |
| SHAP (SHapley Additive exPlanations) | A method used in machine learning to interpret the output of complex models and determine the contribution of each input feature to the prediction [35]. |
FAQs: Understanding Structural Alert Filters
Q1: What are structural alert filters, and why are they used in drug discovery? Structural alert filters are computational tools that identify chemical substructures, or "alerts," associated with undesired compound behaviors in biological assays. They are used in High-Throughput Screening (HTS) to triage compounds likely to be frequent hitters (FHs)—molecules that generate false-positive results through various interference mechanisms rather than genuine target interaction [41]. Common interference mechanisms include colloidal aggregation, spectroscopic interference (e.g., autofluorescence), inhibition of reporter enzymes (e.g., firefly luciferase), and inherent chemical reactivity [41]. By flagging these compounds early, filters help prevent wasted resources on false leads and enhance the efficiency of hit-finding campaigns [41].
Q2: How have structural alert filters evolved beyond the original PAINS rules? The field has moved beyond relying solely on Pan-Assay Interference Compounds (PAINS) filters. Criticisms of early rules like PAINS include ambiguous substructure screening endpoints and high rates of false positives [41]. Modern integrated platforms, such as ChemFH, represent a significant evolution. They combine [41]:
- High-Quality Prediction Models: Using advanced architectures like multi-task directed message-passing neural networks (DMPNN) trained on vast, curated datasets (e.g., over 800,000 compounds) to achieve high predictive accuracy (AUC ~0.91).
- Diverse and Defined Alert Libraries: Incorporating hundreds of representative alert substructures with clearly defined interference mechanisms, moving beyond a single, opaque rule set [41].
- Uncertainty Estimation: Providing a measure of confidence for model predictions, aiding in decision-making [41].
- Comprehensive Rule Integration: Aggregating multiple established rule sets beyond PAINS, such as those from Bristol-Myers Squibb (BMS), Lilly MedChem, and alerts for specific interferents like GST-hitters and luciferase inhibitors [42].
Q3: What are the primary limitations of relying solely on structural alerts? While invaluable, structural filters have key limitations that necessitate a cautious approach [41]:
- Contextual Blindness: They cannot discern whether a problematic substructure is essential for genuine, specific target binding or will invariably cause assay interference.
- Over-reliance and "Over-filtering": Strict application can lead to the premature dismissal of promising compound classes or potential chemical starting points.
- Chemical Space Bias: The utility and accuracy of substructure rules are dependent on the chemical space of the training data. Rules derived from one dataset may not generalize well to structurally novel libraries [41].
- Lack of Mechanistic Insight: A structural alert flags a potential problem but does not confirm the mechanism of interference, which requires experimental follow-up.
Q4: What is the best practice for using structural alerts in a screening pipeline? Best practice involves using structural filters as a triage and prioritization tool, not an absolute removal criterion. Experts recommend [41]:
- Use Multiple Complementary Methods: Combine different rule sets (e.g., BMS, LINT, Toxicophore) and modern prediction models like ChemFH to get a broader perspective [42].
- Leverage Computational Predictions First: Use platforms like ChemFH for rapid virtual evaluation of compound libraries before engaging in wet-lab experiments [41].
- Prioritize for Experimental Validation: Compounds flagged by multiple methods or high-confidence models should be deprioritized or subjected to specific counter-screen assays to confirm interference.
- Never Ignore Experimental Data: A compound that passes computational filters but shows aberrant activity in confirmatory assays should still be treated with suspicion, and vice-versa.
Troubleshooting Guides
Guide 1: Addressing Frequent Hits in Luciferase Reporter Assays
Problem: A high number of initial "hits" from a luciferase-based reporter assay are suspected to be false positives caused by luciferase enzyme inhibition.
Background: Some compounds directly inhibit the firefly luciferase (FLuc) reporter enzyme, quenching the luminescent signal and appearing as "actives" in antagonist-mode screens. This is a classic frequent hitter mechanism [41].
Investigation and Resolution Protocol:
| Step | Action | Purpose and Technical Notes |
|---|---|---|
| 1. In-silico Triage | Screen hit compounds against dedicated FLuc inhibitor structural alerts and predictive models (e.g., within ChemFH or using specific Luciferase Inhibitor rules) [41] [42]. | To rapidly identify compounds with a high computational probability of being FLuc inhibitors. Prioritizes compounds for experimental confirmation. |
| 2. Confirmatory Assay | Perform a counter-screen using a dual-luciferase assay system. This involves co-transfecting the firefly luciferase reporter and a control reporter (e.g., Renilla luciferase) from a different constitutive promoter [43]. | A true target-specific hit will only affect the firefly luciferase signal. A FLuc inhibitor will suppress both the experimental (firefly) and control (Renilla) signals, revealing itself as an assay interferent. |
| 3. Orthogonal Assay | Test compounds in a non-luciferase-based assay for the same target (e.g., ELISA, RT-qPCR, or a different reporter system like SEAP). | Confirms biological activity through a mechanism independent of luciferase chemistry. A compound active in the primary screen but inactive here is likely a false positive [41]. |
| 4. Data Normalization | For future screens, implement a dual-luciferase system from the outset. Normalize firefly luminescence to the Renilla control for each sample. | This controls for well-to-well variation, transfection efficiency, and compound toxicity, and directly flags luciferase inhibition, reducing false positives [43]. |
Guide 2: Managing Computational Over-reliance and False Negatives
Problem: A promising compound series is being flagged by multiple structural filters, leading to its potential dismissal, but you suspect the alerts may not be relevant in this specific chemico-biological context.
Background: Over-reliance on structural filters can lead to "over-filtering" and the loss of valuable chemical matter. The goal is to balance risk management with the opportunity to explore novel scaffolds [41].
Investigation and Resolution Protocol:
| Step | Action | Purpose and Technical Notes |
|---|---|---|
| 1. Alert Interrogation | Precisely identify the triggering substructure and its associated interference mechanism (e.g., "potential electrophile" or "chelator") using the filter's documentation [42]. | Determines the specific theoretical risk. Understanding the mechanism is the first step in designing experiments to test for it. |
| 2. Contextual Risk Assessment | Evaluate if the alerting group is part of the core scaffold or a peripheral substituent. Assess if it is solvent-exposed or buried in a protein binding pocket in structural models. | A core scaffold alert is riskier than a modifiable side chain. An inaccessible reactive group may not interfere in a specific binding event. |
| 3. Experimental De-risking | Design and run targeted counter-screen assays based on the proposed interference mechanism. See the table below for specific experiments. | Provides empirical evidence to confirm or refute the computational alert. |
| 4. Strategic Chemistry | If activity is confirmed but an alert remains, initiate a medicinal chemistry exploration to synthesize analogs that remove the alerting substructure while maintaining potency. | This is the definitive strategy to eliminate the interference concern while advancing the series, moving from a "flag" to a solution. |
Targeted Experimental De-risking Strategies:
| Suspected Mechanism | Experimental Counter-Screen | Interpretation |
|---|---|---|
| Colloidal Aggregation | Repeat the assay in the presence of non-ionic detergents (e.g., 0.01% Triton X-100) or by adding increasing concentrations of compound to look for a sharp, non-saturable inhibition curve [41]. | Genuine inhibition is often unaffected or reduced by detergent. Aggregation-based inhibition is frequently abolished. A steep Hill slope is indicative of aggregation. |
| Chemical Reactivity | Incubate the compound with a scavenger nucleophile like glutathione (GSH) or DTT, then re-test in the assay. Perform a covalent binding assay (e.g., LC-MS). | A significant drop in potency after incubation with a nucleophile suggests covalent, non-specific reactivity. |
| Fluorescence Interference | Measure the compound's intrinsic fluorescence at the assay's excitation/emission wavelengths. Run the assay in a fluorescence-based mode without the biological target. | Fluorescence signal overlapping with the assay readout indicates potential for interference. |
| Enzyme Inhibition (e.g., FLuc) | As detailed in Troubleshooting Guide 1, use a dual-reporter assay or an orthogonal assay format [43]. | Confirms or rules out specific reporter enzyme inhibition. |
The Scientist's Toolkit: Essential Research Reagents & Platforms
Table: Key Resources for Investigating Assay Interference
| Tool / Resource | Function / Description | Relevance to Interference Assessment |
|---|---|---|
| ChemFH Platform [41] | An integrated online platform using DMPNN models and 1,441 alert substructures to predict multiple interference types (aggregators, fluorescers, luciferase inhibitors, reactive compounds). | A comprehensive first step for virtual screening of compound libraries to triage potential frequent hitters. |
| Dual-Luciferase Assay Kit [43] | A reagent system allowing sequential measurement of Firefly and Renilla luciferase activity from a single sample. | The gold-standard method for normalizing data and identifying firefly luciferase inhibitors in reporter gene assays. |
| Non-ionic Detergents (Triton X-100) [41] | Detergents that can disrupt the formation of compound colloidal aggregates in aqueous assay buffers. | A simple additive for confirmatory assays to test for aggregation-based inhibition. |
| Scavenger Nucleophiles (GSH, DTT) | Small, reactive molecules that can covalently bind to electrophilic compounds. | Used in pre-incubation experiments to test for and quench chemically reactive, promiscuous compounds. |
| Structural Filter Libraries (e.g., BMS, LINT, PAINS) [42] | Curated sets of SMARTS patterns defining undesirable substructures, accessible through toolkits like medchem. |
Enable in-house computational screening and profiling of compound libraries against multiple rule sets. |
Experimental Protocol: A Workflow for Validating Screening Hits
This protocol outlines a step-by-step process to triage and validate primary HTS hits, minimizing false positives from assay interference.
Objective: To distinguish true target-specific actives from false positives arising from common interference mechanisms. Principal: A cascade of in-silico and experimental filters of increasing specificity.
Procedure:
In-Silico Triage:
- Input the list of confirmed primary hits (e.g., compounds showing activity above a defined threshold in the HTS) into an integrated prediction platform like ChemFH [41].
- Simultaneously, screen the structures against multiple structural alert libraries (e.g., BMS, Lilly MedChem, PAINS) using a cheminformatics toolkit [42].
- Output: A ranked list of hits categorized by their predicted risk of being frequent hitters.
Dose-Response Confirmation:
- Re-test the compounds, prioritizing those with lower computational risk, in a dose-response format (e.g., 10-point, 1:3 serial dilution) to generate IC₅₀/EC₅₀ curves.
- Analysis: Look for a clean, saturable sigmoidal curve. Compounds with steep, non-saturable, or bell-shaped curves may indicate interference.
Mechanistic Counter-Screens:
- Based on the in-silico predictions, subject the compounds to specific de-risking assays.
- For suspected aggregators: Repeat the dose-response assay in the presence and absence of 0.01% Triton X-100. A significant right-shift in potency with detergent suggests aggregation [41].
- For suspected luciferase inhibitors: Use a dual-luciferase reporter assay. A compound that suppresses both firefly and Renilla signals is likely a luciferase inhibitor [43].
- For suspected reactive compounds: Pre-incubate the compound with 1 mM glutathione (GSH) or DTT for 1-2 hours, then run the dose-response assay. A large loss of potency suggests covalent modification was key to the activity [41].
Orthogonal Assay Validation:
- The most critical step. Test the remaining compounds in a functionally similar but technologically distinct assay that does not rely on the same readout (e.g., switch from a luciferase reporter to measuring endogenous mRNA levels by RT-qPCR or target protein levels by ELISA) [41].
- Interpretation: A true target-specific hit will show congruent activity in both the primary and orthogonal assays. Discrepancies strongly indicate assay-specific interference.
Final Decision: Only compounds that pass through this entire cascade—showing clean dose-response curves, negative results in relevant counter-screens, and confirmed activity in an orthogonal assay—should be considered validated hits for further investment and optimization.
The Tox21 Program is a federal research collaboration established to transform toxicology from an observational science into a predictive discipline that can efficiently forecast chemical effects on human health [44]. Its goals include prioritizing chemicals for more extensive testing, developing more predictive models of toxicological responses, and reducing reliance on animal testing through the use of New Approach Methodologies (NAMs) [44].
A significant challenge in the high-throughput screening (HTS) approaches used by Tox21 is assay interference—where chemicals generate false signals by directly interfering with detection technology rather than through genuine biological activity [5]. Such interference can lead to inaccurate data interpretation and wasted resources. To address this, Tox21 developed dedicated interference assays to identify compounds that cause autofluorescence or inhibit luciferase enzymes, enabling researchers to distinguish true biological activity from technological artifacts [5].
The Tox21 consortium screened 8,305 unique chemicals across multiple interference assay platforms to systematically quantify chemical-assay interference [5]. These assays measured luciferase inhibition and autofluorescence at different wavelengths under various conditions.
Key Quantitative Results from Tox21 Interference Screening
Table 1: Summary of Tox21 Interference Assay Results for 8,305 Chemicals
| Interference Type | Assay Conditions | Active Compounds (%) | Key Characteristics of Interferants |
|---|---|---|---|
| Luciferase Inhibition | Cell-free biochemical | 9.9% | Chemicals that directly inhibit firefly luciferase enzyme activity |
| Autofluorescence (Red) | Cell-free & cell-based | 0.5% | Compounds emitting red light upon excitation |
| Autofluorescence (Green) | Cell-free & cell-based | 4.2% | Compounds emitting green light upon excitation |
| Autofluorescence (Blue) | Cell-free & cell-based | 7.6% | Compounds emitting blue light upon excitation |
Interference Mechanisms and Impact
Assay interference in HTS primarily occurs through two distinct mechanisms:
- Luciferase Interference: Test compounds directly inhibit the firefly luciferase enzyme or chemically react with the luciferin substrate, reducing luminescence signal independent of biological activity [5].
- Fluorescence Interference: Includes both autofluorescence (compounds naturally emit light when excited at specific wavelengths) and fluorescence quenching (compounds absorb excitation or emission light, reducing detectable signal) [13] [5].
These interference mechanisms are particularly problematic because they can generate false positives or mask true biological activity, potentially leading to incorrect conclusions about chemical effects [13] [5]. The Tox21 interference assays were specifically designed to identify such compounds and help researchers avoid misinterpretations in primary screening assays.
Experimental Protocols for Interference Assays
Luciferase Inhibition Assay Protocol
Table 2: Key Reagents for Luciferase Interference Assay
| Reagent | Source | Function in Assay |
|---|---|---|
| Firefly Luciferase | Sigma-Aldrich | Enzyme generating luminescent signal |
| D-Luciferin | Sigma-Aldrich | Enzyme substrate that produces light when oxidized |
| PTC-124 | Santa Cruz Biotechnology | Positive control compound for luciferase inhibition |
| White/Solid 1536-well Plates | Greiner Bio-One | Optimal plates for luminescence signal detection |
Step-by-Step Methodology:
Substrate Dispensing: Dispense 3 µL of substrate mixture (containing 50 mM Tris-acetate pH 7.6, 13.3 mM magnesium acetate, 0.01 mM D-luciferin, 0.01 mM ATP, 0.01% Tween, 0.05% BSA) into 1,536-well plates using a Flying Reagent Dispenser (FRD) [5].
Compound Transfer: Transfer 23 nL of test compounds, positive control (PTC-124), or DMSO control to assay plates using a Pintool station [5].
Enzyme Addition: Add 1 µL of 10 nM firefly luciferase enzyme solution to all wells except designated background control wells, which receive buffer only [5].
Incubation and Reading: Incubate plates for 5 minutes at room temperature, then measure luminescence intensity using a Viewlux plate reader [5].
Data Analysis: Normalize raw data relative to DMSO control wells (0% inhibition) and PTC-124 control wells (100% inhibition). Fit concentration-response data to the Hill equation to calculate IC50 values and classify curve quality [5].
Autofluorescence Assay Protocol
Cell Culture Preparation:
- Maintain HepG2 cells in Eagle's Minimum Essential Medium (EMEM) with 10% fetal bovine serum and penicillin/streptomycin [5].
- Maintain HEK-293 cells in Dulbecco's Modified Eagle's Medium (DMEM) with equivalent supplements [5].
- Culture cells at 37°C in a humidified atmosphere with 5% CO₂ [5].
Assay Configuration: The autofluorescence assay measures interference at three wavelength ranges (red, blue, and green) under two conditions [5]:
- Cell-based: Cells plated in assay wells
- Cell-free: Culture medium only
Experimental Procedure:
- Cell Plating: Plate cells in assay plates or prepare medium-only controls.
- Compound Exposure: Add test compounds across a concentration range.
- Signal Measurement: Measure fluorescence intensity at all three wavelength ranges using appropriate excitation/emission filters.
- Data Analysis: Identify compounds that produce concentration-dependent increases in fluorescence signal beyond background levels.
Diagram 1: Tox21 interference screening workflow with two main assay types.
Technical Support Center: Troubleshooting Guides and FAQs
Frequently Asked Questions
Q1: What is the difference between true biological activity and assay interference?
True biological activity occurs when a compound specifically modulates the intended biological target or pathway, producing a concentration-dependent response consistent with the assay's mechanistic design. Assay interference occurs when compounds directly affect the detection system through mechanisms like luciferase inhibition, autofluorescence, or fluorescence quenching, without engaging the biological target [13] [5]. Interference often produces atypical concentration-response curves and can be identified through dedicated counter-screens.
Q2: Why are some interference mechanisms wavelength-dependent?
Autofluorescence is wavelength-dependent because different chemical structures absorb and emit light at specific wavelengths based on their molecular properties and electronic configurations [5]. Compounds with conjugated ring systems may autofluoresce in blue/green wavelengths, while larger aromatic structures might emit in red wavelengths. This explains why Tox21 measures interference across multiple wavelength ranges.
Q3: How can we preemptively identify potential interferents before screening?
The Tox21 program developed InterPred, a web-based tool that uses machine learning models to predict the likelihood of assay interference for new chemical structures [5]. Based on molecular descriptors and chemical properties, InterPred can predict interference potential with approximately 80% accuracy, helping researchers flag problematic compounds before they enter screening pipelines.
Q4: What are the best practices for mitigating interference in HTS campaigns?
- Include interference counter-screens in early screening tiers
- Use orthogonal assays with different detection technologies to confirm hits
- Analyze concentration-response curves for atypical patterns
- Leverage computational prediction tools like InterPred for compound prioritization
- Implement statistical outlier detection to flag compounds with abnormal fluorescence or luminescence patterns [13] [5]
Troubleshooting Common Issues
Problem: High hit rate in primary screening that doesn't confirm in secondary assays
- Potential Cause: Widespread assay interference from autofluorescent compounds or luciferase inhibitors.
- Solution: Run all active compounds through the appropriate interference assays (luciferase inhibition or autofluorescence depending on your primary assay technology). Exclude interferents from hit lists before secondary testing.
Problem: Inconsistent results between cell-based and cell-free assays
- Potential Cause: Cellular properties such as autofluorescence from media components (e.g., riboflavins) or endogenous substances in cells and tissues [13].
- Solution: Include proper controls for cellular autofluorescence, consider using riboflavin-free media for live-cell imaging applications, and always run parallel cell-free interference assays.
Problem: Compounds showing activity in one assay format but not in another with the same target
- Potential Cause: Technology-specific interference rather than true biological activity.
- Solution: Confirm hits using an orthogonal assay with a fundamentally different detection method (e.g., switch from fluorescence to luminescence or mass spectrometry-based detection) [13].
Diagram 2: Decision workflow for suspected assay interference troubleshooting.
Essential Research Reagent Solutions
Table 3: Key Reagents for Implementing Interference Assays
| Reagent/Category | Specific Examples | Function in Interference Testing |
|---|---|---|
| Luciferase Assay Components | Firefly luciferase, D-Luciferin substrate | Core components for luciferase inhibition screening |
| Positive Controls | PTC-124 (luciferase inhibitor) | Reference compound for assay validation and normalization |
| Cell Lines | HEK-293, HepG2 | Standardized cellular systems for cell-based interference testing |
| Assay Plates | White 1536-well plates (luminescence), Black plates (fluorescence) | Optimal signal detection with minimal cross-talk |
| Detection Instruments | Viewlux plate reader (luminescence), Multi-mode readers (fluorescence) | Accurate signal quantification across wavelengths |
| Computational Tools | InterPred web tool | Prediction of interference potential for new compounds |
The Tox21 program's systematic approach to identifying and characterizing assay interference has provided invaluable resources for the HTS community. By implementing these interference assays and following the troubleshooting guidelines outlined in this technical support document, researchers can significantly improve the quality and reliability of their screening data.
The development of predictive tools like InterPred represents the future of interference mitigation—shifting from reactive identification to proactive prediction [5]. As HTS technologies continue to evolve with more complex 3D models, high-content imaging, and increased parameterization, the fundamental principles of interference recognition and mitigation remain essential for generating biologically meaningful data.
Researchers are encouraged to incorporate interference testing as a standard component of their screening workflows and to leverage the publicly available Tox21 interference data and tools to enhance the efficiency and success of their drug discovery and toxicology screening efforts.
Building Robust Assays: Practical Strategies for Troubleshooting and Optimization
Frequently Asked Questions
1. What are the acceptable ranges for Z'-factor, CV, and Signal-to-Background, and what do they indicate about my assay's quality?
The table below summarizes the standard interpretations for these key metrics, which are used collectively to judge assay robustness and fitness for high-throughput screening (HTS) [45] [46] [47].
| Metric | Calculation | Excellent | Acceptable | Marginal/Poor | ||
|---|---|---|---|---|---|---|
| Z'-factor | ( 1 - \frac{3(\sigmap + \sigman)}{ | \mup - \mun | } ) | 0.5 - 1.0 [46] | 0 - 0.5 [46] [47] | < 0 [46] |
| Intra-Assay CV | ( \frac{\text{Standard Deviation}}{\text{Mean}} \times 100\% ) | < 10% [45] | N/A | > 10% [45] | ||
| Inter-Assay CV | ( \frac{\text{SD of Plate Means}}{\text{Mean of Plate Means}} \times 100\% ) | < 15% [45] | N/A | > 15% [45] | ||
| Signal-to-Background (S/B) | ( \frac{\mup}{\mun} ) | Dependent on assay context and dynamic range. A higher ratio is generally better. |
Assay Interpretation:
- An excellent Z'-factor (0.5 - 1.0) indicates a high degree of separation between your positive and negative controls, making the assay highly suitable for screening [46].
- A marginal Z'-factor (0 - 0.5) may be acceptable for complex assays, such as high-content screening, where biologically relevant hits can be subtle [47].
- A Z'-factor less than 0 signals significant overlap between control populations, rendering the assay unsuitable for screening [46].
- CVs measure precision. High intra-assay CVs can indicate issues with pipetting technique or reagent stability, while high inter-assay CVs point to plate-to-plate or day-to-day inconsistency [45].
2. My Z'-factor is acceptable, but my hit confirmation rate is low. What could be causing this?
A good Z'-factor ensures your controls are well-separated, but it does not guarantee that hits are valid. A low confirmation rate often indicates a high level of assay interference from your test compounds [13] [5] [2]. Common culprits include:
- Compound Autofluorescence: Compounds that naturally emit light can create false-positive signals in fluorescence-based assays [13] [5].
- Compound Quenching: Compounds that absorb light can quench the signal from your assay's fluorophores, leading to false negatives or false positives depending on the assay design [13] [5].
- Luciferase Inhibition: In luminescence-based reporter assays, compounds can directly inhibit the luciferase enzyme, causing a false-positive hit in an inhibition screen [5].
- Cytotoxicity or Altered Cell Morphology: In cell-based assays, general cell death or dramatic changes in cell shape can disrupt the assay readout, leading to false positives or negatives that are not related to your target biology [13].
3. What experimental strategies can I use to identify and eliminate assay interference?
Implementing a triage cascade of counter, orthogonal, and fitness screens is the most effective strategy to prioritize high-quality hits [2]. The workflow below outlines this process:
- Counter-Screens: Designed to directly measure technology-based interference.
- Orthogonal Assays: Confirm bioactivity using a fundamentally different detection technology.
- Cellular Fitness Screens: Rule out general toxicity.
4. During assay development, my CV is unacceptably high. How can I troubleshoot this?
A high Coefficient of Variation (CV) indicates high well-to-well variability within an assay plate. The following flowchart guides you through systematic troubleshooting:
- Pipetting Technique and Calibration: This is a very common source of error. Ensure pipettes are properly calibrated and maintained. For viscous samples like saliva, pre-wet pipette tips to improve accuracy [45].
- Reagent Stability: Determine the stability of all reagents under storage and assay conditions. Test stability after multiple freeze-thaw cycles and assess if "leftover" daily reagents can be reliably used in future assays [25].
- Cell-based Assay Issues: In high-content screening, low or variable cell seeding density can dramatically increase CV. Ensure a uniform, optimal cell density is used across the plate. Also, check for compound-mediated cytotoxicity or cell loss, which can reduce cell counts below a robust threshold [13] [47].
- Edge Effects and Plate Layout: Temperature and evaporation gradients can cause the outer wells of a plate to behave differently. If possible, avoid placing critical controls or samples only on the edge. Using an interleaved-signal format for controls can help identify and account for spatial biases [25] [47].
The Scientist's Toolkit: Essential Research Reagent Solutions
The following table lists key reagents and their functions in developing and validating a robust HTS assay.
| Reagent / Material | Function in QC and Validation |
|---|---|
| DMSO (Dimethyl Sulfoxide) | Universal solvent for test compounds. Compatibility with the assay must be validated by testing a range of final concentrations (e.g., 0-1% for cell-based assays) to ensure no solvent interference [25]. |
| Control Agonists/Antagonists | Pharmacological agents used to define the "Max" (e.g., EC80 of agonist), "Min" (e.g., unstimulated or fully inhibited), and "Mid" (e.g., EC50 of agonist) signals during plate uniformity studies [25]. |
| Luciferase Enzyme & D-Luciferin | Essential reagents for luminescence reporter assays. Also used in cell-free counter-screens to identify compounds that inhibit luciferase activity, a common source of assay interference [5]. |
| Fluorescent Dyes & Probes | Used for detection in fluorescence-based assays and high-content imaging. Can be susceptible to interference from autofluorescent or quenching compounds [13] [5]. |
| Cell Viability Assay Kits (e.g., MTT, CellTiter-Glo) | Used in cellular fitness counter-screens to identify cytotoxic compounds whose activity may be conflated with target-specific effects [2]. |
| BSA or Detergents (e.g., Tween-20) | Added to assay buffers to reduce nonspecific compound binding and prevent compound aggregation, a frequent cause of false-positive hits [2]. |
| Stable Cell Lines (e.g., HEK-293, HepG2) | Used in cell-based assays. Different cell types (e.g., HEK-293 vs. HepG2) can be used in parallel to test the cell-type specificity of compound activity and interference [5]. |
Troubleshooting Guides
Troubleshooting Assay Interference and Artifacts
Q1: My assay results show high background noise or non-specific binding. What are the potential causes and solutions?
A: High background, or non-specific binding (NSB), is a common issue that can stem from several sources. The table below outlines the primary causes and their solutions. [48]
| Cause | Description | Solution |
|---|---|---|
| Incomplete Washing | Carryover of unbound reagents leads to high and variable background. | Follow recommended washing techniques strictly; do not overwash (e.g., more than 4 times) or allow wash solution to soak, as this can reduce specific binding. [48] |
| Reagent Contamination | Airborne contamination from concentrated analyte sources (e.g., cell culture media, sera) can falsely elevate signals. | Use dedicated pipettes and filtered tips; work in a clean area; do not use adhesive plate seals; cap reagents immediately after use. [48] |
| Substrate Contamination | Unstable substrates like PNPP (for alkaline phosphatase) can be contaminated by environmental enzymes. | Aliquot only the needed substrate; never return unused substrate to the original bottle. [48] |
| Compound Auto-fluorescence | Some test compounds are intrinsically fluorescent at the assay's detection wavelength. | Implement a counterscreen assay that measures fluorescence change in the absence of enzyme and substrate to identify and exclude these false positives. [49] |
Q2: How can I identify and manage interference from hemolysis, lipemia, and icterus?
A: These common interferents require specific strategies for identification and mitigation. [26]
| Interferent | Primary Cause & Mechanism | Impact on Assays | Management Strategies |
|---|---|---|---|
| Hemolysis | Release of hemoglobin and intracellular components (e.g., K+, AST, LDH) from RBCs. Causes additive, spectral, chemical, or dilutional interference. [26] | Artificially increases K+, Mg2+, LDH, AST, ALT, phosphorus; interferes with spectrophotometric readings. [26] | Use automated serum indices; differentiate in vivo vs. in vitro hemolysis (e.g., via haptoglobin levels); for testing, spike hemolysate into non-hemolyzed serum, not purified hemoglobin. [26] |
| Lipemia | Turbidity from triglyceride-rich lipoproteins (chylomicrons, VLDL). Causes light scattering and volume displacement. [26] | Interferes with almost all spectrophotometric measurements and can block analyte access in immunoassays. [26] | Request fasting samples; use ultracentrifugation to remove lipoproteins; for testing, use intact human lipoproteins instead of synthetic emulsions like Intralipid. [26] |
| Icterus | Elevated bilirubin (conjugated or unconjugated). Can absorb light and exhibit "pseudo" peroxidase activity. [26] | Interferes with colorimetric reactions, particularly diazonium methods for bilirubin measurement. [26] | Sample blanking and bichromatic measurements can help minimize spectral interference. [26] |
Q3: My dose-response curves are inaccurate, especially at the extremes. How should I fit my data?
A: For most immunoassays and bioassays, the dose-response relationship is not linear. Using linear regression can introduce significant inaccuracies, particularly at the high and low ends of the standard curve. [48]
- Recommended Curve-Fitting Methods: Use point-to-point, cubic spline, or 4-parameter logistic (4PL) curve-fitting routines. These methods are more robust and accurately reflect the non-linear nature of the data. [48]
- Methods to Avoid: Avoid using linear regression. Forcing non-linear data into a linear model will produce inaccurate results. [48]
- Validation: The optimal way to validate your curve-fitting method is through "back-fitting" your standard values as unknowns and ensuring they report back their nominal values. The most direct assessment is to assay controls with known analyte levels across the analytical range. [48]
Troubleshooting Assay Miniaturization
Q4: What are the common pitfalls when miniaturizing an assay to 384-well or 1536-well formats?
A: Miniaturization, while beneficial, introduces specific technical challenges. The table below summarizes key issues and solutions. [50]
| Challenge | Description | Mitigation Strategy |
|---|---|---|
| Evaporation | Smaller volumes are more susceptible to evaporation, leading to edge-well effects ("plate effects") and high variability. [50] | Use sealed plates or plates with secure lids; employ humidity chambers during incubation; consider using specialized microplates designed to minimize evaporation. [50] |
| Liquid Handling | Automated liquid handling in small volumes can lead to tip clogging, high dead volumes, poor mixing, and carryover contamination. [50] | Use non-contact dispensers (e.g., acoustic liquid handlers) to eliminate carryover and tip issues; ensure proper calibration and maintenance of liquid handling robots. [51] |
| Biology & Cell Health | In cell-based assays, issues like reagent waste, uneven cell distribution, poor viability, and imaging artifacts are magnified. [50] | Optimize cell seeding density and dispensing parameters; use microplates with optical-quality bottoms for imaging; allow time for cells to acclimate after dispensing. [50] |
Q5: What are the key advantages of assay miniaturization that justify overcoming these challenges?
A: The benefits are substantial and impact both efficiency and scientific capability. [51]
- Reduced Reagent and Sample Consumption: Miniaturization slashes the volume of expensive reagents, specialized cell lines (e.g., iPSC-derived cells), and precious patient samples required. This can lead to cost savings of thousands of dollars per screen. [50] [51]
- Increased Throughput and Speed: Using plates with higher well densities (384, 1536) allows for more tests to be run in parallel, significantly accelerating screening campaigns and data generation. [51]
- Enhanced Sensitivity and Precision: Concentrating targets in smaller volumes and reducing diffusion distances can improve the signal-to-noise ratio, leading to more sensitive and precise measurements. [51]
Experimental Protocols
Protocol: Miniaturized High-Throughput Fluorescent Assay for NADPH-Consuming Enzymes
This protocol details the development of a miniaturized fluorescent assay in 384-well format to monitor the conversion of NADPH to NADP+, as exemplified for the mycobacterial enzymes RmlC and RmlD. [49]
Research Reagent Solutions
| Item | Function/Description | Example (From Protocol) |
|---|---|---|
| Target Enzyme(s) | The protein(s) of interest whose activity is being measured. | RmlC and RmlD, purified. [49] |
| Substrates & Cofactors | Molecules consumed or transformed during the enzymatic reaction. | TDP-KDX (substrate) and NADPH (cofactor). [49] |
| Assay Buffer | Provides the optimal chemical environment (pH, ionic strength) for the reaction. | 50 mM MOPS, pH 7.4, 1 mM MgCl2, 0.01% Triton X-100, 10% glycerol. [49] |
| Positive Control Inhibitor | A known inhibitor used to validate the assay's ability to detect inhibition. | Thymidine diphosphate (TDP). [49] |
| Assay Plates | The vessel for the reaction; black plates are used for fluorescence to minimize cross-talk. | Black low-volume 384-well plate (e.g., Corning #3676). [49] |
| Test Compounds | The molecules being screened for potential inhibitory activity. | Stored in DMSO in 384-well polypropylene source plates. [49] |
Equipment Required
- Plate reader capable of reading fluorescence (Ex/Em: ~340/460 nm) in 384-well plates. [49]
- Pipetting workstation (e.g., with a 384-tip head or a 100 nL pintool for compound transfer). [49]
- Reagent dispenser (e.g., a Multidrop-384). [49]
Procedure
NADPH Standard Curve:
- Serially dilute NADPH in assay buffer across a concentration range (e.g., 3-80 µM) in a 384-well polypropylene plate. [49]
- Transfer triplicates of each concentration to a black 384-well assay plate. [49]
- Read fluorescence and plot fluorescence vs. concentration. Perform linear regression to generate the standard curve. This curve is used to convert fluorescence changes to NADPH concentrations in subsequent steps. [49]
Enzyme Titration and Time Course:
- Prepare dilutions of the enzyme(s) to achieve a range of final concentrations in the assay. [49]
- Dispense a substrate/cofactor mix (e.g., TDP-KDX and NADPH at 2x final concentration) into the assay plate. [49]
- Start the reaction by adding the enzyme dilutions. Include blank wells with NADPH but no substrate. [49]
- Read fluorescence immediately (T=0) and at regular intervals (e.g., every 3 min for 180 min) while incubating at the assay temperature (e.g., 25°C). [49]
- Data Analysis: For each enzyme concentration, plot fluorescence over time. Select the enzyme concentration that produces the largest linear change in fluorescence over your desired assay period (e.g., 90 minutes). Use the standard curve to convert this change to the amount of NADPH consumed. [49]
K~m~ Determination:
- The goal is to determine the K~m~ of the substrate and the cofactor (NADPH) to inform screening concentrations. [49]
- Substrate K~m~: Vary the substrate concentration at a fixed, saturating concentration of NADPH. [49]
- Cofactor K~m~: Vary the NADPH concentration at a fixed, saturating concentration of substrate. [49]
- For screening, substrate and cofactor should be used at concentrations close to their K~m~ values to maximize sensitivity to inhibitors. [49]
Primary Screening Assay:
- Using a pintool, transfer test compounds from the source plate to the assay plate. [49]
- Dispense the enzyme solution (in assay buffer) to all wells to initiate the reaction. [49]
- Read the plate fluorescence immediately (T=0) and again after the predetermined incubation period (T=90 min). [49]
- Data Analysis: Calculate the percent inhibition for each compound using the formula:
% Inhibition = [1 - ( (F~T=90~ - F~T=0~)~compound~ / (F~T=90~ - F~T=0~)~control~ ) ] * 100Select "hits" based on a predetermined threshold of inhibition. [49]
Counterscreen Assay (False Positive Identification):
- To rule out compounds that fluoresce at 460 nm or otherwise interfere with the signal, run a separate assay. [49]
- Transfer compounds to a plate containing only assay buffer (no enzyme and no substrate). [49]
- Measure fluorescence at T=0 and T=90 min. Compounds that show a significant fluorescence change in this counterscreen are likely false positives and should be excluded. [49]
Assay Development and Screening Workflow
Protocol: Addressing Sample Dilution and Matrix Effects
Q: My sample dilution does not yield linear results. What should I do?
A: Poor dilution linearity can occur due to the "hook effect" (very high analyte concentrations saturating the assay) or matrix interference. [48]
- Use Assay-Specific Diluents: Always use the diluent recommended or provided with the kit. It is formulated to match the matrix of the standards, minimizing dilutional artifacts. [48]
- Validate In-House Diluents: If you must use another diluent (e.g., PBS with a carrier protein), you must validate it. [48]
- Assay the Diluent Alone: The absorbance should not be significantly different from the kit's zero standard. [48]
- Perform Spike-and-Recovery: Spike a known amount of analyte into the proposed diluent at several concentrations across the assay's range. Recovery should be between 95-105% for the diluent to be deemed acceptable. [48]
- Avoid Unsuitable Diluents: Do not use diluents containing sodium azide or significant detergent concentrations, as these can affect assay accuracy. Plain PBS or TBS without a carrier protein can lead to analyte adsorption to the tube walls, causing low recovery. [48]
FAQs
Q1: Are there new assay technologies that can simplify lead discovery and avoid complex reagent requirements?
A: Yes. The Structural Dynamics Response (SDR) assay is a newer technology that uses the natural vibrations of proteins to detect ligand binding. It attaches a sensor protein (NanoLuc luciferase) to the target protein. When a ligand binds to the target, it alters the protein's motion, which changes the light output of the sensor. This method is "target-agnostic," meaning it does not require knowledge of the protein's function, specific substrates, or cofactors. It can detect binders at active and allosteric sites using minimal amounts of protein, making it a potentially universal platform for drug lead discovery and optimization. [52]
Q2: What key parameters should I use to validate my assay's performance before a high-throughput screen?
A: Before an HTS campaign, you should statistically validate your assay's performance using a quality control (QC) validation plate. A key parameter is the Z'-factor, which assesses the assay's robustness and suitability for screening. A Z'-factor above 0.5 is generally considered excellent, indicating a good separation band between positive and negative controls. [53] Other parameters include signal-to-background ratio and coefficient of variation (CV). [49]
Troubleshooting Assay Interference
FAQs and Troubleshooting Guides
Addressing Compound Aggregation
Q: A significant number of hits from my biochemical HTS show detergent-sensitive inhibition. What is the likely cause, and how can I confirm it?
A: The behavior you describe is characteristic of compound aggregation, a common form of assay interference where compounds form colloids that non-specifically inhibit enzymes [54]. To confirm and mitigate this:
- Confirmatory Counter-Screens: Perform a detergent-based counter-screen by including non-ionic detergents like Triton X-100 (typically at 0.01% v/v) in your assay buffer. A significant attenuation of activity in the presence of detergent strongly suggests aggregation [54].
- Use of Decoy Proteins: Incorporate bovine serum albumin (BSA) at a starting concentration of 0.1 mg/mL into the assay buffer before adding the test compound. High concentrations of carrier proteins can prevent aggregation interference by pre-saturating the aggregate surfaces [54].
- Analyze Concentration-Response Curves: Be suspicious of compounds that show steep Hill slopes or activity only at higher micromolar concentrations, as these are hallmarks of aggregators [54].
Managing DMSO Tolerance and Compatibility
Q: How do I determine the maximum tolerated DMSO concentration for my cell-based or biochemical assay?
A: DMSO compatibility is fundamental to assay validation, as the solvent can directly affect protein function and cell health. Follow this experimental protocol:
- Experimental Protocol: Run your validated assay in the absence of test compounds but with a titration of DMSO. Test a range of concentrations, typically from 0% to 10% final concentration, to determine the threshold at which DMSO begins to significantly affect your assay signal or cell viability [25].
- Best Practice: For cell-based assays, it is recommended to keep the final DMSO concentration under 1%, unless specific experiments demonstrate that higher concentrations are tolerated without detrimental effects [25].
- Quality Control for Dispensing: When using acoustic dispensing for DMSO solutions, implement a high-throughput quality control method, such as a photometric dual-dye protocol, to verify the accuracy and precision of nanoliter-volume dispenses [55].
Table 1: Summary of DMSO Effects and Mitigation Strategies
| Aspect | Observed Impact | Recommended Mitigation Strategy |
|---|---|---|
| Cell Viability | Decrease in cell count with increased DMSO percentage and exposure time [56] | Keep final concentration <1%; perform a viability assay (e.g., trypan blue) to establish a safe threshold [56] [25]. |
| Enzyme Activity | Can denature proteins or alter kinetics at high concentrations [25] | Determine maximum tolerated DMSO concentration during assay validation and use it consistently in all screening experiments [25]. |
| Dispensing Accuracy | Inaccurate volumes of compound/DMSO solutions lead to variable final concentrations [55] | Implement high-throughput QC (e.g., dual-dye photometry) for acoustic dispensers [55]. |
Ensuring Reagent Stability
Q: How can I establish robust storage and handling procedures for critical assay reagents to minimize variability across a screening campaign?
A: Reagent instability is a major source of assay drift and poor data quality. A systematic approach to stability testing is required.
- Define Storage Conditions: Determine the stability of all reagents under storage conditions. If a reagent is commercial, follow the manufacturer's specifications. For in-house reagents, identify conditions (e.g., -80°C, aliquoted) under which activity is retained without loss [25].
- Test Freeze-Thaw Cycles: If your assay requires reagents to be frozen and thawed repeatedly, test the stability after multiple (e.g., 1, 3, 5) freeze-thaw cycles to establish a safe limit [25].
- Assess In-Assay and Daily Stability: Conduct time-course experiments for each incubation step to define the range of acceptable times for the assay protocol. Furthermore, test the stability of leftover reagents stored under daily operating conditions to determine if they can be reused, which is critical for managing costs with expensive reagents [25].
Table 2: Key Reagent Stability Tests for HTS Assay Validation
| Stability Test | Objective | Experimental Approach |
|---|---|---|
| Long-Term Storage | Identify conditions that preserve reagent activity for the duration of the screening campaign. | Aliquot and store reagents under proposed conditions (e.g., -80°C). Test activity at time zero and at regular intervals over time. |
| Freeze-Thaw Stability | Establish the maximum number of times a reagent can be thawed and refrozen without degradation. | Subject reagent to multiple freeze-thaw cycles. Compare activity to a fresh or single-thawed aliquot. |
| Bench-Top Stability | Determine how long a reagent remains stable during daily operations outside of controlled storage. | Prepare the reagent and hold it under standard assay conditions (e.g., on ice or at room temperature). Measure activity over several hours. |
| Lot-to-Lot Validation | Ensure consistency when a new lot of a critical reagent is introduced. | Perform a bridging study by running the assay with both the old and new lots in parallel to demonstrate equivalence [25]. |
Controlling for Edge Effects
Q: My 384-well assay shows consistently higher signals in the perimeter wells compared to the interior wells. What steps can I take to minimize this "edge effect"?
A: Edge effects, often caused by uneven evaporation or temperature gradients across the plate, can be mitigated through careful experimental design and validation.
- Plate Uniformity Assessment: During assay validation, conduct a formal Plate Uniformity study. This involves running plates over multiple days where "Max," "Min," and "Mid" signals are measured in an interleaved pattern across the entire plate to quantify spatial variability [25].
- Use of Proper Seals and Humidity Control: Ensure plates are sealed with high-quality, low-evaporation seals during incubation steps. Using humidified incubators or placing plates in a humidified chamber can drastically reduce evaporation from outer wells.
- Statistical Design and Data Analysis: For critical screens, consider using plate designs that interleave controls across the entire plate, not just the edges. This allows for more sophisticated data normalization and detection of spatial trends during data analysis [25].
The Scientist's Toolkit: Essential Research Reagent Solutions
Table 3: Key Reagents for Mitigating HTS Assay Interferences
| Reagent / Material | Function in Troubleshooting | Example Usage & Notes |
|---|---|---|
| Triton X-100 | Non-ionic detergent used to disrupt compound aggregates [54]. | Use at 0.01% (v/v) in assay buffer. Attenuation of activity suggests aggregation interference. |
| Bovine Serum Albumin (BSA) | Decoy protein that prevents non-specific modulation by compound aggregates [54]. | Add to assay at 0.1 mg/mL before the test compound. Does not reverse established inhibition. |
| DMSO (Quality Controlled) | Universal solvent for compound libraries. Quality is critical for accurate dispensing [55]. | Use high-purity, dry DMSO. Implement QC checks on acoustic dispensers to ensure volume accuracy. |
| Non-Animal Sera | Provides physiologically relevant conditions in cell-based assays while reducing variability from animal-derived components. | Useful in optimizing cell culture and assay media for stability and performance. |
Experimental Workflow and Signaling Pathways
The following diagram illustrates a logical workflow for systematically validating an HTS assay to mitigate the common pitfalls discussed in this guide.
HTS Assay Validation Workflow
This logical workflow for HTS assay validation ensures that critical sources of interference are systematically addressed before a screen enters production, saving time and resources by ensuring data quality from the outset [25].
Serial Dilution and Recovery Tests to Investigate Suspected Interference
FAQ: Serial Dilution and Recovery Tests
1. What is the fundamental difference between an interference experiment and a recovery experiment?
- Interference Experiment: This test estimates the constant systematic error caused by specific substances (like bilirubin, hemoglobin, or lipids) that may be present in the sample. A given concentration of an interfering material typically causes a constant amount of error, regardless of the concentration of the analyte you are trying to measure [57].
- Recovery Experiment: This test estimates the proportional systematic error, whose magnitude increases as the concentration of the analyte increases. It helps validate that your method can accurately measure the analyte that has been added to a sample, often by using a standard solution of the sought-for analyte [57].
2. When should I perform a serial dilution test to investigate interference?
A serial dilution test is particularly valuable when you suspect the presence of interfering antibodies, such as heterophile antibodies or human anti-animal antibodies, in immunoassays. These substances can cause a non-linear response in your assay. If the measured analyte concentration does not decrease in a linear fashion as the sample is diluted, it strongly suggests the presence of such interferents [58].
3. My recovery result is 80%. Is this acceptable?
A recovery of 80% is often considered acceptable. In some guidelines, such as those from the World Health Organization (WHO), a recovery of >80% is considered good [59]. However, the final judgment depends on the performance requirements for your specific test. You must compare the observed error (in this case, 20%) to the amount of error that is allowable for your test based on regulatory or clinical requirements [57].
4. What are the most common substances that cause interference in assays?
The three most common interferents in clinical samples are:
- Hemolysis: The release of hemoglobin and other cellular contents from red blood cells [26] [60].
- Lipemia: Turbidity in a sample caused by elevated triglycerides [26] [60].
- Icterus: Elevated levels of bilirubin in the serum or plasma [26] [60]. Other common interferents include certain medications, preservatives, anticoagulants, and proteins like heterophile antibodies [57] [58].
5. How can I mitigate interference from lipemia in my samples?
Lipemia can be mitigated by:
- Requesting fasting specimens from patients (8-12 hour fast) [26].
- For samples already collected, a physical method like ultracentrifugation can be effective. By centrifuging the sample at high speed, a fat layer forms at the top, which allows you to aspirate the less lipemic plasma below for analysis [60].
- It is generally not recommended to use mathematical equations to correct for the volume displacement effect caused by lipids, as these equations do not account for other interfering effects like light scattering [26].
Troubleshooting Guides
Guide 1: Investigating Interference with a Serial Dilution Test
Symptom: A patient's sample shows an unexpectedly high (or low) result that does not fit the clinical picture.
Investigation Protocol: This guide is used to identify non-linear effects, often caused by interfering proteins like heterophile antibodies [58].
Procedure:
- Prepare the Sample: Start with the patient's original sample.
- Perform Serial Dilution: Create a series of dilutions (e.g., 1:2, 1:4, 1:8) using an appropriate diluent, such as the assay's zero calibrator or a non-immune serum [58]. Ensure the dilution factor is precise.
- Analyze Dilutions: Measure the analyte concentration in each of the diluted samples using your standard assay protocol.
- Calculate and Plot: For each dilution, calculate the "theoretical concentration" by multiplying the measured value by the dilution factor. For example, if a 1:2 dilution measures 150 U/L, the theoretical concentration is 150 * 2 = 300 U/L.
- Interpret the Results:
- No Interference: The calculated theoretical concentrations will be similar across all dilutions, resulting in a flat line when plotted against the dilution factor.
- Interference Present: The theoretical concentrations will vary significantly with dilution, typically showing a non-linear, decreasing trend as the sample is diluted. This indicates that the interfering substance's effect is being reduced by dilution [58].
The following diagram illustrates the logical workflow for this investigation:
Guide 2: Quantifying Interference with a Spiking Experiment
Symptom: You need to systematically test and quantify the effect of a specific substance (e.g., a drug, bilirubin, or hemoglobin) on your assay's accuracy.
Investigation Protocol: This method estimates the constant systematic error caused by a suspected interferent by comparing spiked and unspiked samples [57].
Procedure:
- Select Patient Pools: Use at least three different patient specimens or pools that contain the analyte of interest at clinically relevant levels [57].
- Prepare Test Pairs: For each patient sample, prepare two test samples:
- Test Sample A: Add a small volume of a solution containing the suspected interfering material (the "interferer") to an aliquot of the patient specimen.
- Test Sample B (Control): Add the same small volume of a pure solvent (or a non-interfering diluting solution) to another aliquot of the same patient specimen [57].
- Analysis: Analyze both sets of test samples in replicate (duplicate measurements are good practice) using the method under investigation [57].
- Calculation:
- Calculate the average of the replicates for each test sample.
- For each patient sample pair, calculate the difference:
Difference = Average(Test Sample A) - Average(Test Sample B). - Average the differences from all specimens tested to get the average interference [57].
- Interpretation: Compare the average interference to your predetermined allowable error. If the observed error is greater than the allowable error, the interference is clinically significant and the method's performance may be unacceptable for that interferent [57].
Guide 3: Performing a Recovery Experiment
Symptom: You need to validate that your analytical method accurately measures the analyte across its range, particularly after modifying a manufacturer's method or when a comparison method is unavailable.
Investigation Protocol: This classical technique estimates proportional systematic error by measuring the accuracy of analyte measurement in a sample to which a known amount of the analyte has been added [57].
Procedure:
- Select Patient Pools: Use patient specimens with low or baseline levels of the analyte.
- Prepare Test Pairs: For each patient sample, prepare two test samples:
- Test Sample A: Add a small volume (e.g., 0.1 mL) of a high-concentration standard solution of the sought-for analyte to the patient specimen (e.g., 0.9 mL). The addition should be small to minimize matrix dilution (ideally ≤10%) [57].
- Test Sample B (Control): Add the same volume of a standard diluent to another aliquot of the same patient specimen.
- Analysis: Analyze both test samples using the method under investigation.
- Calculation:
% Recovery = (Concentration in Spiked Sample - Concentration in Unspiked Sample) / Concentration of Analyte Added * 100%- The concentration of analyte added is calculated based on the standard solution's concentration and the volumes used [57].
- Interpretation: Compare the % Recovery to your target (ideally 100%). A recovery of >80% is often considered good, but the final acceptability is determined by comparing the proportional error it introduces to your assay's allowable total error [57] [59].
Data Presentation
| Interferent | Primary Mechanism of Interference | Example Analytes Affected | Typical Direction of Effect |
|---|---|---|---|
| Hemolysis | Additive absorbance; Release of intracellular constituents; Chemical inhibition | Potassium, LDH, AST, ALT, Iron, Phosphate | Falsely Increased (K⁺, LDH, AST) [60] |
| Lipemia | Light scattering/turbidity; Volume displacement (solvent exclusion) | Sodium, Chloride, Total Bilirubin | Falsely Decreased (Na⁺, Cl⁻); Falsely Increased (T. Bilirubin) [60] |
| Icterus | Additive absorbance at specific wavelengths | Creatinine (Jaffé method), Total Protein | Variable (Method Dependent) |
| Recovery Result | Interpretation | Recommended Action |
|---|---|---|
| 85% - 100% | Good to excellent recovery | Generally acceptable. Verify against allowable total error. |
| 80% - 85% | Moderate recovery | May be acceptable depending on the assay's required precision and clinical use. |
| < 80% | Poor recovery | Unacceptable proportional error. Method requires investigation and improvement. |
The Scientist's Toolkit
Key Research Reagent Solutions
| Reagent / Material | Function in Experiment | Key Considerations |
|---|---|---|
| Standard Solution (Analyte) | Used in recovery experiments to spike samples with a known quantity of the pure analyte [57]. | Concentration should be high enough to make a significant change post-addition while keeping dilution of the sample matrix ≤10% [57]. |
| Interferent Solution | Used in interference experiments to introduce a suspected interfering substance at a known concentration [57]. | For soluble materials, use standard solutions. For hemolysis or lipemia, use hemolysate or intact human lipoproteins rather than synthetic analogs for accurate results [26]. |
| Appropriate Diluent | Used for serial dilution and preparing control samples. | The ideal diluent is the assay's zero calibrator or a non-immune serum to maintain sample matrix [58]. For HTS cell-based assays, this is often the base culture media [61]. |
| High-Quality Pipettes | Critical for accurate volume dispensing in sample, standard, and interferent preparation [57]. | Precision is more critical than absolute accuracy for interference pairs, as the same volumes must be maintained in paired samples [57]. |
| Automated Liquid Handler | Enables high-throughput, precise compound/reagent transfer in screening campaigns [61]. | Systems like the BioMek FX pintool or Labcyte Echo can transfer nanoliter volumes, improving consistency and throughput [61]. |
Assay interference poses a significant challenge in high-throughput screening (HTS), potentially leading to false positives, false negatives, and unreliable data. Understanding how different platform technologies mitigate these interference mechanisms is crucial for robust experimental design. Flow-through and homogeneous assay platforms each employ distinct strategies to minimize interference, offering researchers powerful tools to enhance data quality and screening efficiency.
FAQ: Fundamental Concepts
What is the primary difference between homogeneous and heterogeneous assays? Homogeneous assays are "mix-and-read" formats that require no separation steps, while heterogeneous assays (like traditional ELISAs) require wash steps to separate bound from unbound components [62]. The absence of washing in homogeneous assays simplifies automation but increases potential for compound-mediated interference since interfering substances are not removed prior to signal detection [62].
How do flow-through systems fundamentally reduce interference? Flow-through systems minimize contact times between reagents, samples, and matrix components [63]. Since molecular interactions causing interference are a function of affinity, concentration, and exposure time, reduced contact times favor specific high-affinity interactions (like antibody-antigen binding) while minimizing low-affinity interference [63].
What are the most common sources of interference in screening assays? Interference can stem from multiple sources including:
- Compound-mediated effects: Fluorescence quenching, auto-fluorescence, light scattering, and absorption (inner filter effects) [62] [13]
- Matrix components: Phospholipids, carbohydrates, proteins, high viscosity, salt concentrations, and pH imbalances in biological samples [63] [64]
- Biological interference: Cross-reactivity with similar proteins, isoforms, precursors, binding proteins, and endogenous antibodies [63]
- Cellular sources: Autofluorescence from media components (e.g., riboflavins), cells, or tissues [13]
Troubleshooting Guide: Identifying and Addressing Interference
Problem: Suspected Matrix Interference
Symptoms:
- Lower-than-expected readings or signal suppression [64]
- Poor spike recovery (typically outside 80-120% range) [64]
- Inconsistent results between sample matrices
Solutions:
- Perform a spike-and-recovery experiment: Add a known quantity of standard to your sample and compare results to standard in buffer [64]
- Implement sample dilution: Dilute samples using appropriate buffers to reduce concentration of interfering components [63] [64]
- Use matrix-matched calibration: Dilute both standards and samples in the same matrix to balance matrix-induced variations [64]
- Employ flow-through technology: Utilize systems that minimize contact time between samples and detection components [63]
Problem: Compound-Mediated Interference in Homogeneous Assays
Symptoms:
- Unexpected fluorescence patterns or quenching
- Signal attenuation or enhancement unrelated to biological activity
- Inconsistent dose-response relationships
Solutions:
- Implement counter-screens: Develop specific assays to identify interfering compounds [62] [65]
- Use time-resolved detection: Employ TR-FRET to reduce interference from short-lived fluorescence [62]
- Consider alternative detection technologies: Switch to radiometric assays (like SPA) that are less susceptible to fluorescent compound interference [66]
- Employ advanced plate readers: Utilize detection from below the plate to reduce influence of compounds in supernatant [66]
Problem: Cross-Reactivity and Non-Specific Binding
Symptoms:
- False positives or overestimation of analyte concentration [63]
- High background signal [67]
- Poor specificity in complex matrices
Solutions:
- Optimize antibody selection: Use monoclonal antibodies for capture to establish high specificity [63]
- Implement blocking strategies: Use specialized blockers and diluents to reduce non-specific binding [67]
- Validate antibody specificity: Test antibodies for cross-reactivity with closely related proteins during development [63]
- Reduce contact times: Use flow-through systems to favor specific high-affinity interactions [63]
Comparative Performance Data
Table 1: Interference Susceptibility Across Assay Formats
| Assay Format | Interference Type | Susceptibility | Advantages | Limitations |
|---|---|---|---|---|
| Traditional ELISA | Matrix effects, cross-reactivity | Moderate to High | Familiar technology, wash steps remove some interferents | Multiple steps, time-consuming, difficult to automate [68] |
| Homogeneous Assays (TR-FRET, Alpha) | Compound fluorescence, quenching | High | No wash steps, high throughput, easy automation | Interfering compounds not removed before detection [62] |
| Flow-Through Systems | Matrix interference, non-specific binding | Low | Minimal contact time, automated volume definition, reduced matrix effects | Specialized equipment required [63] |
| Radiometric (SPA) | Compound absorption, quenching | Low | Direct detection, minimal compound interference, broad applicability | Radioactive materials require special handling [66] |
Table 2: Quantitative Comparison of False Positive Rates
| Assay Technology | Reported False Positive Rate | Primary Interference Mechanisms | Effective Counter-Screens |
|---|---|---|---|
| TR-FRET | ~10% false negatives due to compound interference [66] | Fluorescence quenching, autofluorescence | Same assay with stopped reaction, alternative detection methods [62] |
| AlphaScreen | High false positive rate requiring secondary confirmation [66] | Singlet oxygen quenchers, compound absorption | SPA or other confirmation assays [66] |
| SPA (Radiometric) | Lower false positive rate [66] | Colored compound absorption (reduced by bottom-reading) | Typically not required, saving time and cost [66] |
| Flow-Through Immunoassay | Significantly reduced matrix interference [63] | Low-affinity molecular interactions | Parallelism/linearity testing, spike recovery assessment [63] |
Experimental Protocols
Protocol 1: Assessing Matrix Interference via Spike Recovery
Purpose: To identify and quantify matrix interference in biological samples [64].
Materials:
- Test samples (serum, plasma, tissue homogenates)
- Standard analyte of known concentration
- Appropriate dilution buffer
- Assay platform (ELISA, MSD, or other immunoassay)
Procedure:
- Prepare two sets of samples:
- Set A: Standard diluted in buffer across expected concentration range
- Set B: Standard spiked into test sample matrix at same concentrations
- Minimize standard volume added to matrix (<5-10% of total volume) to avoid disrupting matrix properties [64]
- Run both sets through your standard assay procedure
- Calculate percent recovery for each concentration:
- Interpret results: 80-120% recovery typically indicates acceptable matrix effects [64]
Troubleshooting Notes:
- If recovery falls outside acceptable range, implement sample dilution or matrix-matched calibration [64]
- For persistent interference, consider platform change to flow-through technology [63]
Protocol 2: Acid Dissociation for Target Interference in ADA Assays
Purpose: To overcome interference from soluble multimeric targets in anti-drug antibody (ADA) assays [69].
Materials:
- Acid panel (HCl, acetic acid, citric acid at varying concentrations)
- Neutralization buffer (Tris or other appropriate base)
- Bridging immunoassay reagents
- Sample matrix (serum or plasma)
Procedure:
- Treat samples with different acids at varying concentrations
- Incubate for optimized duration to disrupt target complexes
- Neutralize samples with appropriate basic solution
- Run treated samples through standard bridging assay format
- Compare signals to untreated controls to assess interference reduction [69]
Optimization Tips:
- Test multiple acid types and concentrations to identify optimal conditions
- Ensure neutralization is complete to prevent assay component damage
- Monitor assay sensitivity to ensure it is maintained after treatment [69]
Technology Workflow Diagrams
The Scientist's Toolkit: Research Reagent Solutions
Table 3: Essential Reagents for Interference Management
| Reagent Type | Specific Examples | Function in Interference Reduction | Application Notes |
|---|---|---|---|
| Specialized Diluents | Protein stabilizers, blockers [67] | Reduce non-specific binding and matrix interference | Can increase signal-to-noise ratios while maintaining specific signal [67] |
| Affinity Capture Beads | SPA beads, streptavidin-coated capture beads [66] [68] | Enable homogeneous radiometric detection or specific capture | SPA beads allow mix-and-measure format without separation steps [66] |
| Time-Resolved Fluorophores | Lanthanide complexes (Europium, Terbium) [62] | Reduce short-lived background fluorescence | Enable TR-FRET with delayed measurement to avoid compound autofluorescence [62] |
| Acid/Basic Treatment Solutions | HCl, acetic acid, neutralization buffers [69] | Disrupt interfering complexes in sample | Effective for soluble target interference in ADA assays; requires optimization [69] |
| Blocking Reagents | Protein-based blockers, surfactants [67] | Minimize non-specific binding | Critical for reducing background in heterogeneous assays [67] |
FAQ: Advanced Implementation
When should I consider switching to a flow-through system? Consider flow-through technology when:
- Working with complex matrices that cause significant interference [63]
- Sample volume is limited (flow-through systems enable miniaturization) [63]
- Studying precious samples where repeated testing is not feasible [63]
- High precision is required (automated volume definition reduces pipetting error) [63]
What are the advantages of radiometric assays despite radioactivity concerns? Radiometric assays like SPA offer:
- Lower false positive rates due to minimal compound interference [66]
- Direct detection without bulky labels that may affect binding properties [66]
- Comparable binding kinetics to natural counterparts (label replaces natural atom) [66]
- Broad applicability across target classes with established protocols [66]
How can I validate that interference has been successfully mitigated? Implement these validation strategies:
- Parallelism/linearity testing with serial sample dilutions [63]
- Spike recovery assessments with acceptable 80-120% recovery [64]
- Comparison with orthogonal assay technologies [65]
- Assessment of precision and reproducibility across multiple runs [63]
Confirming True Hits: A Multi-Layered Framework for Hit Validation
The Critical Role of Orthogonal Assays with Alternative Readout Technologies
In high-throughput screening (HTS) and high-content screening (HCS), researchers face a significant challenge: differentiating true biological activity from assay interference. Such interference can lead to false positives that obscure genuine hits and waste valuable resources [10]. Orthogonal assays are a critical strategy to address this problem. An orthogonal assay tests the same biological hypothesis but uses a fundamentally different detection technology or readout method to confirm results obtained from a primary screen [10] [70]. This approach provides an additional layer of validation, helping researchers verify that observed activity is directed against the biological target of interest rather than resulting from assay-specific artifacts [10] [71].
Understanding and Identifying Assay Interference
Assay interference can arise from various sources, including the compounds themselves, biological components, or detection systems. Understanding these interference types is the first step in developing effective countermeasures.
Common Types of Assay Interference
The table below summarizes frequent interference types, their characteristics, and prevalence in screening libraries [10]:
| Interference Type | Effect on Assay | Key Characteristics | Prevalence in Library |
|---|---|---|---|
| Compound Aggregation | Non-specific enzyme inhibition; protein sequestration [10] | Concentration-dependent; sensitive to detergent addition; reversible by dilution [10] | 1.7–1.9% (up to 90-95% of actives in some biochemical assays) [10] |
| Compound Fluorescence | Increases or decreases detected light; affects apparent potency [10] [13] | Reproducible and concentration-dependent [10] | 2-5% (blue-shifted spectra); up to 50% of actives in certain assays [10] |
| Firefly Luciferase Inhibition | Inhibition or activation in luciferase reporter assays [10] | Concentration-dependent inhibition of the reporter enzyme [10] | At least 3% (up to 60% of actives in some cell-based assays) [10] |
| Redox Cycling | Inhibition or activation via generation of reactive oxygen species [10] | Concentration-dependent; potency affected by reducing reagents [10] | ~0.03% generate H2O2 at appreciable levels [10] |
| Cytotoxicity | Apparent inhibition due to cell death [10] [13] | Often occurs at higher compound concentrations or with longer incubation [10] | Not specified |
This workflow outlines the logical process for identifying and confirming true hits while flagging interference through orthogonal strategies:
Troubleshooting Guides & FAQs
Frequently Asked Questions on Assay Interference
Can a fluorescent compound still represent a viable HCS hit/lead?
Yes, compounds that interfere with an assay technology may still be bioactive and represent viable hits. In these cases, an orthogonal assay is crucial to confidently establish desirable bioactivity and de-risk follow-up studies. Once bioactivity is confirmed, assays with minimal technology interference should preferably drive structure-activity relationship (SAR) studies to avoid optimizing toward interference (structure-interference relationships, or 'SIR') [71].
If washing steps are included in an HCS assay, why are technology interferences still present?
Washing steps do not necessarily remove intracellular compounds, just as they do not remove intracellular stains. Researchers should not assume that washing will completely eliminate unwanted compounds from within cells [71].
Can technology-related compound interferences like fluorescence and quenching be predicted by chemical structure?
Compounds with conjugated electron systems ('aromatic') are more likely to absorb and emit light via fluorescence. While quantum mechanical calculations can predict fluorescence, user-friendly tools are less common. Empirical testing using actual HCS assay conditions is recommended. Exceptions include fluorescent impurities, degradation products, or compounds that become fluorescent in cellular contexts due to metabolism or local biochemical environments [71].
If a compound interferes in one HCS assay, how likely is it to interfere in another HCS assay?
This depends on multiple factors: the interference type (technology or non-technology), specific experimental variables (concentration, treatment time, washing steps, etc.), the similarity in assayed biology, and the vessel materials used. Assays with similar readouts (e.g., GFP reporters) may show similar susceptibilities to green-fluorescent compounds. Interfering compounds in one assay may still be valuable starting points if desirable bioactivity is confirmed orthogonally [71].
What should be done if an orthogonal assay is not available?
Without an orthogonal assay, interference-specific counter-screens should be performed. Selectivity assays can assess whether compound effects occur in related and unrelated biological systems. Genetic perturbations (e.g., knockout or overexpression) of the putative target can also help. While counter-screens de-risk interferences, relying on a single assay method remains risky, and developing an orthogonal method is highly recommended whenever possible [71].
The Scientist's Toolkit: Research Reagent Solutions
| Reagent / Material | Function in Assay Development |
|---|---|
| Non-ionic Detergent (e.g., Triton X-100) | Reduces aggregation-based inhibition when included in assay buffer at 0.01–0.1% [10] |
| Reducing Agent Alternatives (e.g., Cysteine, Glutathione) | Replaces DTT and TCEP in buffers to minimize interference from redox cycling compounds [10] |
| Affinity-Purified Antibodies | Provides specific detection for immunoassays with broader reactivity to target analytes [72] |
| Control Samples (Low, Medium, High) | Enables run-to-run quality control when made with the source of analyte in the sample matrix [72] |
| Qualified Reference Standard | Calibrates quantitative potency assays, essential for reporting activity in units [73] |
| Cell Lines with Defined Expression | Provides biologically relevant models for orthogonal assays that reflect the mechanism of action [70] [73] |
Experimental Protocols for Orthogonal Assays
Protocol: Implementing a Matrix Approach for Gene Therapy Potency Assays
Gene therapies (GTs) present unique challenges for potency assay development due to their complex mechanisms of action (MoA). The matrix approach, advocated by the FDA, uses multiple complementary assays to draw a collective conclusion about potency [73].
1. Define Critical Quality Attributes (CQAs):
- Identify the key biological activities essential for the GT product's therapeutic effect.
- For a viral therapeutic, this includes delivery of genetic payload, production of the bioactive molecule, and its biological effect [73].
2. Assay Selection and Development:
- Select at least two orthogonal methods that reflect different aspects of the MoA.
- Examples include:
- Transduction Efficiency Assays: Measure the delivery of genetic material to target cells.
- Transgene Expression Assays: Quantify the production of the therapeutic protein or RNA.
- Functional Activity Assays: Assess the biological effect of the expressed transgene [73].
3. Assay Qualification and Validation:
- Early Clinical Phases: Establish multiple potential potency assays. Focus on biological relevance and ensure they are "MoA-reflective."
- Late Clinical Phases: Qualify the best assays based on accumulated data. Assess accuracy, precision, sensitivity, robustness, and specificity.
- Commercial Licensure: Fully validate the final matrix of assays selected for lot release [73].
4. Correlation Assessment:
- Perform correlation assessments to link potency assay results with relevant biological activity and clinical data.
- The goal is not necessarily to mimic the exact clinical situation but to establish a reliable correlation between the assay readout and the expected clinical response [73].
Protocol: Counterscreen for Firefly Luciferase Inhibition
Purpose: To identify compounds that inhibit firefly luciferase (FLuc) itself, rather than the targeted biology, in primary screens that use FLuc as a reporter [10].
Methodology:
- Test Actives: Screen compounds identified as hits in the primary assay against purified firefly luciferase.
- Use KM Substrate: Perform the counterscreen using Michaelis-Menten (KM) levels of substrate to ensure sensitivity.
- Assess Concentration-Dependence: Determine if the compound shows concentration-dependent inhibition of the luciferase enzyme [10].
Interpretation: Compounds that inhibit the purified luciferase in this counterscreen are likely false positives and should be deprioritized unless confirmed by an orthogonal assay with a different reporter system [10].
Protocol: Using Mass Spectrometry as an Orthogonal Readout
Purpose: To confirm hit activity without the limitations of optical detection methods, thereby avoiding interference from fluorescent or colored compounds [74].
Methodology (MALDI-TOF MS):
- Sample Preparation: Transfer sub-microliter volumes of assay reaction from a 1536-well plate onto a MALDI target plate.
- Ionization: Use matrix-assisted laser desorption/ionization (MALDI) to generate ions without labeling.
- Detection: Analyze the mass-to-charge (m/z) ratio of the analyte using a time-of-flight (TOF) mass analyzer.
- Separation (Optional): For complex samples or to distinguish isobars/isomers, incorporate trapped ion mobility spectrometry (TIMS) to separate ions by their collisional cross-section (CCS) prior to TOF analysis [74].
Advantages: This label-free approach directly measures the analyte, eliminating risks associated with labels interfering with target biology. It provides high selectivity and access to a wider drug target space [74].
This workflow integrates an orthogonal MS-based assay to confirm hits from a primary optical screen:
In high-throughput screening (HTS), accurately distinguishing specific biological activity from technology-specific interference is a critical challenge in hit validation. False positive signals caused by assay interference can misdirect research efforts and consume valuable resources. This technical support center provides troubleshooting guides and FAQs to help researchers identify and address common interference mechanisms in dose-response analysis, enabling more reliable interpretation of screening data and improving the quality of hits selected for further development.
Understanding Assay Interference
FAQ: Common Questions on Assay Interference
What are the main types of assay interference compounds? Compound Interfering with an Assay Technology (CIAT) can cause false readouts through various mechanisms, including fluorescence quenching or amplification, luciferase inhibition, chemical reactivity, or interference with an assay's detection mechanism (e.g., biotin mimetics in bead-based assays) [19]. These compounds show activity not through genuine target engagement but through interference with the assay technology itself.
How prevalent is assay interference in screening? Interference rates vary by assay technology. In one large-scale screening of 8,305 chemicals, interference rates ranged from 0.5% (red autofluorescence) to 9.9% (luciferase inhibition) [5]. Approximately 12% of active chemicals from the NIH Molecular Libraries Small Molecule Repository demonstrated paradoxical luminescence changes, highlighting the significance of this issue [5].
Why does my assay show good window but poor Z'-factor? Assay window alone is not a sufficient measure of assay performance. The Z'-factor incorporates both the assay window size and the variability (standard deviation) in the data [75]. An assay can have a large window but significant noise, resulting in a poor Z'-factor (<0.5). The formula for Z'-factor is: 1 - [3×(σₚ + σₙ) / |μₚ - μₙ|], where σₚ and σₙ are the standard deviations of the positive and negative controls, and μₚ and μₙ are their means [75].
What are the limitations of PAINS filters? Pan-Assay Interference Compounds (PAINS) filters identify substructural motifs linked to promiscuous behavior but have significant limitations. They were derived from AlphaScreen technology and show low accuracy when applied to other technologies (9% for AlphaScreen vs 1.5% for FRET and TR-FRET) [19]. The presence of a PAINS substructure does not necessarily imply an undesirable mechanism, and their applicability is limited by the chemical space and assay technology used in their development [19].
Troubleshooting Guide: Identifying Interference
Problem: No assay window in TR-FRET assays
- Potential Cause: Incorrect emission filter selection [75]
- Solution: Use exactly the recommended emission filters for your instrument. Refer to instrument setup guides and test your microplate reader's TR-FRET setup before beginning experimental work [75]
Problem: Inconsistent results between replicate wells
- Potential Cause: Contamination of kit reagents with concentrated analyte sources [76]
- Solution: Clean all work surfaces before assay, use aerosol barrier pipette tips, avoid talking over uncovered microtiter plates, and do not use automated plate washers previously exposed to concentrated analyte solutions [76]
Problem: High background or non-specific binding in ELISA
- Potential Causes: Incomplete washing, reagent contamination, or substrate contamination [76]
- Solutions: Follow recommended washing techniques without over-washing (do not wash more than 4 times or allow extended soak time), use only provided wash solutions, and minimize contamination of substrates, particularly PNPP in alkaline phosphatase-based ELISA [76]
Problem: Differences in EC50/IC50 values between laboratories
- Potential Cause: Differences in stock solution preparation, typically at 1 mM [75]
- Solution: Standardize compound preparation protocols across laboratories and verify compound integrity and concentration
Experimental Approaches for Interference Identification
Counter-Screen Assays
The most direct approach for identifying technology interference uses artefact assays (counter-screens) that contain all assay components except the target protein. Compounds active in these assays are classified as CIATs (Compounds Interfering with Assay Technology) [19].
Machine Learning Prediction
Machine learning models trained on historical counter-screen data can predict CIATs for new compounds. A random forest classification model using 2D structural descriptors achieved ROC AUC values of 0.70, 0.62, and 0.57 for AlphaScreen, FRET, and TR-FRET technologies respectively, outperforming statistical methods like BSF and PAINS filters [19].
High-Throughput Mass Spectrometry (HTMS)
HTMS serves as a powerful orthogonal method to confirm hits from fluorescence or luminescence-based assays. As a label-free technology, HTMS directly monitors substrate-to-product conversion without requiring substrate modifications, eliminating interference from fluorescent compounds or compounds interacting with hydrophobic fluorescent dyes [77]. In screening campaigns for multiple protease programs, HTMS confirmation rates averaged <30%, while >99% of compounds designed to inhibit the enzymes were confirmed, demonstrating effective removal of detection-based false positives [77].
Quantitative Analysis of Interference
Interference Rates by Assay Technology
Table 1: Interference rates across different assay technologies
| Assay Technology | Interference Rate | Primary Mechanism | Data Source |
|---|---|---|---|
| Luciferase Inhibition | 9.9% | Enzyme inhibition or substrate oxidation | [5] |
| Blue Autofluorescence | 2.9% | Signal interference at blue wavelength | [5] |
| Green Autofluorescence | 2.7% | Signal interference at green wavelength | [5] |
| Red Autofluorescence | 0.5% | Signal interference at red wavelength | [5] |
| AlphaScreen | Not quantified | Bead-based interference, biotin mimetics | [19] |
| FRET/TR-FRET | Not quantified | Fluorescence quenching, spectral overlap | [19] |
Data Analysis Best Practices
TR-FRET Data Analysis
- Calculate emission ratio (acceptor signal/donor signal): 520 nm/495 nm for Terbium (Tb) and 665 nm/615 nm for Europium (Eu) [75]
- The ratio accounts for variances in reagent delivery and lot-to-lot variability
- Normalize titration curves by dividing all values by the average ratio at the bottom of the curve (response ratio) for consistent assessment of assay window [75]
Z'-LYTE Assay Analysis
- Output is the blue/green ratio
- 100% phosphorylation (0% inhibition): minimum ratio
- 0% phosphorylation (100% inhibition): maximum ratio
- Properly developed Z'-LYTE reactions typically show a 10-fold difference in ratio between 100% phosphorylated control and substrate [75]
Research Reagent Solutions
Table 2: Key reagents and technologies for interference mitigation
| Reagent/Technology | Function | Application Context |
|---|---|---|
| Artefact/Counter-Screen Assays | Identify technology-specific interference | All HTS technologies |
| Machine Learning Models (CIAT Predictors) | Predict interference from chemical structure | Early compound triaging |
| High-Throughput Mass Spectrometry (HTMS) | Label-free detection of true substrates/products | Protease, kinase assays |
| RapidFire HTMS System | Ultra-fast MS analysis (5-7 s/sample) | High-throughput confirmation |
| LanthaScreen TR-FRET Assays | Time-resolved detection to reduce autofluorescence | Kinase binding assays |
| Terbium (Tb) & Europium (Eu) Donors | Long-lifetime fluorophores for TR-FRET | Reducing short-lived fluorescence interference |
| Droplet Microfluidics LC Injection | Eliminates autosampler cycle time limitations | Ultra-high-throughput LC analysis |
| Segmented Flow with Wash Droplets | Reduces analyte carryover between samples | Continuous flow analysis |
Experimental Protocols
Protocol 1: Luciferase Interference Counter-Screen
Purpose: Identify compounds that inhibit luciferase enzyme activity [5]
Reagents:
- D-Luciferin substrate (Sigma-Aldrich)
- Firefly luciferase enzyme (Sigma-Aldrich)
- Tris-acetate buffer (50 mM, pH 7.6)
- Magnesium acetate (13.3 mM)
- ATP (0.01 mM)
- Tween (0.01%)
- BSA (0.05%)
Procedure:
- Dispense 3 μL substrate mixture into 1,536-well plates
- Transfer 23 nL test compounds using Pintool station
- Add 1 μL of 10 nM enzyme solution using Flying Reagent Dispenser
- Incubate 5 minutes at room temperature
- Measure luminescence intensity using Viewlux plate reader
- Analyze concentration-response curves (15 concentrations, 1.5 nM to 115 μM)
Data Analysis:
- Normalize raw reads relative to DMSO-only wells (basal, 0%) and PTC-124 control wells (0.58 μM, -100%)
- Fit titration points to Hill equation to calculate IC50 and efficacy values
- Classify curves (Class 1-4) based on fit quality, points above background, and response efficacy [5]
Protocol 2: Autofluorescence Counter-Screen
Purpose: Identify compounds with intrinsic fluorescence at common detection wavelengths [5]
Cell-Based and Cell-Free Formats:
- Test two cell types: HEK-293 and HepG2 cells
- Three fluorescent wavelengths: red, blue, green
- Both cell-based and culture-medium-only conditions
Procedure:
- Culture cells in appropriate media (EMEM for HepG2, DMEM for HEK-293)
- Supplement with 10% FBS and penicillin/streptomycin
- Screen Tox21 library (8,305 chemicals) in triplicate concentration response
- Measure fluorescence at all three wavelengths
- Include concurrent cytotoxicity measurements
Data Interpretation:
- Compare activity in cell-based vs. cell-free formats
- Analyze wavelength-specific interference patterns
- Correlate with cytotoxicity to identify general disruptive compounds [5]
Technology Selection Workflow
Effective dose-response analysis requires careful consideration of technology-specific interference mechanisms. By implementing robust counter-screen assays, utilizing computational prediction tools, and applying orthogonal confirmation technologies, researchers can significantly improve the quality of hits identified in HTS campaigns. The methodologies and troubleshooting approaches presented here provide a framework for distinguishing specific biological activity from assay interference, leading to more efficient use of resources and higher success rates in drug discovery programs.
Using Interference Blocking Reagents and Sample Pre-Treatment
Troubleshooting Guide: Common Interference Issues and Solutions
What are the most common types of assay interference in high-throughput screening?
Assay interference in high-throughput screening (HTS) generally falls into several key categories, each with distinct mechanisms and impacts on data quality.
Table: Common Types of Assay Interference in HTS
| Interference Type | Mechanism | Common Assays Affected | Primary Impact |
|---|---|---|---|
| Compound Autofluorescence [5] [13] [78] | Compounds absorb and emit light, mimicking the assay signal. | Fluorescence-based assays (especially UV/blue excitation). | False positives |
| Compound Quenching [13] [78] | Compounds absorb excitation or emission light, attenuating signal. | Fluorescence-based assays. | False negatives |
| Luciferase Inhibition [5] | Compounds directly inhibit firefly luciferase enzyme activity. | Luminescence-based reporter assays. | False positives (inhibition assays) |
| Chemical Aggregation [54] | Compounds form colloidal aggregates that nonspecifically sequester and inhibit proteins. | Biochemical enzymatic assays. | False positives (inhibition) |
| Cytotoxicity & Altered Morphology [13] | Compounds cause general cell injury, death, or detachment. | Cell-based assays (both fluorescence and luminescence). | False positives/negatives |
| Heterophilic Antibodies [79] [80] | Human antibodies cross-react with assay antibodies. | Immunoassays. | False positives/negatives |
How can I identify and confirm compound-mediated assay interference?
Confirming that an initial "hit" is due to interference rather than genuine bioactivity requires a systematic approach using counter-screens and orthogonal assays.
- Analyze Concentration-Response Curves (CRCs): Aggregators and some other interferents often produce CRCs with steep Hill slopes, which can be a preliminary indicator of nonspecific activity [54].
- Perform a Pre-read: For fluorescence-based assays, read the plate immediately after compound addition but before initiating the biochemical reaction. An elevated signal indicates autofluorescence; a suppressed signal suggests quenching [78].
- Conduct Detergent Sensitivity Tests: Add a non-ionic detergent like Triton X-100 (typically to 0.01%) to the assay buffer. A significant attenuation of activity in the presence of detergent is a strong indicator of aggregation-based interference [54].
- Use Decoy Proteins: Include a high concentration of a carrier protein like Bovine Serum Albumin (BSA, e.g., 0.1 mg/mL) in the assay buffer before adding the test compound. BSA can saturate aggregators, preventing them from interfering with the target protein [54].
- Employ Orthogonal Assays: Test active compounds in a secondary assay that uses a fundamentally different detection technology (e.g., follow up a fluorescence assay with a luminescence or AlphaScreen-based assay) [13] [78].
- Leverage In Silico Prediction Tools: Use computational tools like InterPred to predict the likelihood of a compound causing luciferase inhibition or autofluorescence based on its structure [5].
How can sample pre-treatment and optimized library preparation prevent interference?
Proactive strategies during sample and assay preparation can significantly reduce the incidence of interference.
- Optimize Nucleic Acid Extraction: For viral HTS, silica membrane-based methods have been shown to provide efficient, unbiased recovery of diverse viral genomes (single/double-stranded RNA/DNA), minimizing detection gaps [81].
- Implement Nuclease Treatment: To enrich for encapsidated viral nucleic acids and reduce host background, treat samples with nucleases prior to nucleic acid extraction. This increases the sensitivity of virus detection in complex matrices [81].
- Use Blocking Agents: For immunoassays, use blocking agents to prevent nonspecific binding. Effective blockers include:
- Redshift Assay Signals: When developing new assays, choose reporters with longer excitation/emission wavelengths (red-shifted). For example, couple NAD(P)H-dependent reactions to the diaphorase/resazurin system (ex/em ~570/585 nm) instead of directly measuring NAD(P)H (ex/em ~340/460 nm), as compound autofluorescence is much less common in the red spectrum [78].
- Control Sample Quality: Maintain sample quality and stability through sterile techniques, optimal storage conditions, and standardized protocols to prevent contamination, degradation, and variability that can compromise assays [83].
Frequently Asked Questions (FAQs)
What is the single most effective wet-lab method to prevent aggregation interference in a biochemical assay?
The most effective and straightforward method is the inclusion of a non-ionic detergent like Triton X-100 at 0.01% (v/v) in the assay buffer. This concentration is a good starting point, as it disrupts colloid formation for many aggregators without necessarily disrupting enzyme activity [54].
A large portion of my HTS hits were fluorescent. How can I avoid this in future screens?
This is a common issue, particularly with assays using UV/blue fluorescence. For future screens, you can:
- Profile your compound library across different spectral regions to understand its interference potential [78].
- Design or redesign assays to be "red-shifted," moving away from UV/blue excitation wavelengths to red or near-infrared wavelengths where far fewer compounds are optically active [5] [78].
- Implement a pre-read step as a standard part of your HTS protocol to automatically flag and triage fluorescent compounds before biological analysis [78].
How can I distinguish between true cytotoxicity and interference that looks like cytotoxicity in a high-content imaging assay?
In high-content screening (HCS), both true cytotoxicity and some interference mechanisms (e.g., compounds that cause cells to detach) can result in low cell counts. To distinguish them:
- Review the images manually. Look for clear morphological signs of death (e.g., membrane blebbing, nuclear fragmentation) versus simply empty wells.
- Check for outliers in nuclear stain intensity. Dead cells may have concentrated fluorescence that saturates the camera, while wells with detached cells will have very low signal.
- Run an orthogonal cell viability assay using a different technology, such as a luminescence-based ATP detection assay. If the compound is active in the orthogonal assay, it is likely truly cytotoxic. If not, the effect in the HCS assay is likely interference from cell loss or an artifact affecting the image analysis [13].
My immunoassay results are inconsistent with the clinical presentation. What is a likely cause and how can I test for it?
A common cause of inexplicable immunoassay results is interference from heterophilic antibodies or human anti-animal antibodies (HAMA) in the patient's sample [79] [80].
- Test for it: Perform a spike and recovery experiment. Spike a known amount of the analyte into the patient's sample and into a control buffer. If the recovery in the patient sample is poor (<80% or >120%), it suggests an interfering substance is present [80].
- Mitigate it: Re-run the sample using a heterophilic antibody blocking reagent. If the result normalizes after this treatment, it confirms HAMA interference [80].
Experimental Protocols for Identifying Interference
Protocol 1: Detergent-Based Counter-Screen for Aggregation
Purpose: To determine if the bioactivity of a hit compound is due to colloidal aggregation [54].
Materials:
- Assay buffer (appropriate for your target)
- Triton X-100 detergent
- Test compounds (in DMSO)
- Positive control aggregator (e.g., Congo Red, available from chemical suppliers)
- Standard assay reagents (enzyme, substrate, etc.)
Method:
- Prepare two sets of assay buffer: one standard, and one supplemented with 0.01% (v/v) Triton X-100.
- Serially dilute your test compounds and the positive control aggregator.
- Run your standard assay protocol in parallel using both the detergent-free and detergent-containing buffers.
- Calculate the IC50 or percentage inhibition for each compound in both conditions.
Interpretation: A significant right-shift in the IC50 (e.g., >10-fold) or a dramatic reduction in efficacy in the presence of Triton X-100 is indicative of aggregation-based interference.
Protocol 2: Spike and Recovery for Sample Matrix Interference
Purpose: To validate an immunoassay and assess whether components in a sample matrix interfere with accurate analyte detection [80].
Materials:
- Patient sample or matrix of interest
- Analyte standard of known high purity
- Assay buffer
- Your immunoassay kit/reagents
Method:
- Prepare three sample sets:
- Neat Matrix: The patient sample with no spike.
- Spiked Buffer (Control): A known concentration of analyte standard spiked into assay buffer.
- Spiked Matrix (Test): The same concentration of analyte standard spiked into the patient sample.
- Run all samples in duplicate or triplicate according to your immunoassay protocol.
- Calculate the measured concentration in each sample.
- Calculate the percentage recovery for the spiked matrix using the formula:
- % Recovery = ( [Spiked Matrix] - [Neat Matrix] ) / [Spiked Buffer] × 100
Interpretation:
- 80-120% Recovery: Acceptable, minimal interference.
- <80% Recovery: Signal suppression, indicating something in the matrix is interfering.
- >120% Recovery: Signal enhancement, indicating potential interference or cross-reactivity [80].
Workflow Visualization
Diagram 1: A systematic workflow for identifying and confirming assay interference, incorporating key counter-screens and decision points.
Diagram 2: The diaphorase/resazurin coupling system, a key strategy for "red-shifting" assays away from common compound interference.
The Scientist's Toolkit: Key Research Reagent Solutions
Table: Essential Reagents for Mitigating Assay Interference
| Reagent / Tool | Function | Example Use Case |
|---|---|---|
| Triton X-100 | Non-ionic detergent that disrupts compound aggregates. | Added to biochemical assay buffers at 0.01% to identify/counter aggregation interference [54]. |
| Bovine Serum Albumin (BSA) | Decoy protein that binds aggregators; general blocking agent. | Used at 0.1 mg/mL in assay buffer to prevent aggregation; used in immunoassays to block nonspecific binding [54] [80]. |
| Heterophilic Antibody Blocking Reagent | Blocks human anti-animal antibodies (e.g., HAMA). | Added to patient samples in immunoassays to prevent false positives/negatives [79] [80]. |
| Diaphorase & Resazurin | Enzyme/substrate pair for "red-shifted" detection of NAD(P)H. | Coupled to oxidoreductase assays to move readout from UV (340/460 nm) to red (570/585 nm) spectrum, avoiding autofluorescence [78]. |
| Sodium Chloride (NaCl) | Reduces ionic interactions in immunoassays. | Added to antibody diluents (0.15-0.6 M) to reduce nonspecific binding and background staining [82]. |
| InterPred Web Tool | In silico prediction of luciferase inhibition and autofluorescence. | Used to predict interference potential of new chemical structures prior to screening [5]. |
In high-throughput screening (HTS), identifying initial "hits" is just the beginning of the drug discovery journey. The subsequent challenge lies in confirming that these hits are genuine—specifically engaging the intended target and producing a real biological effect, rather than resulting from assay interference or artifacts. This technical support center provides troubleshooting guides and FAQs to help researchers navigate the complex process of cross-platform hit confirmation, directly addressing the critical issue of assay interference in HTS research.
FAQs: Navigating Hit Confirmation Challenges
1. Why is hit confirmation across multiple platforms necessary, even when my primary HTS data looks robust?
A robust primary HTS assay is crucial ("quality in, quality out"), but it is not sufficient to confirm a true hit [2]. Many compounds initially identified in screening can produce false-positive results due to various forms of assay interference [84] [2]. These include:
- Assay Technology Interference: Compounds may autofluoresce, quench signals, or modulate reporter enzyme activity, interfering with the specific detection technology used in your primary screen [2].
- Compound-Mediated Artifacts: Compounds can form aggregates, exhibit non-specific binding, chelate metals, or act as redox cyclers, leading to promiscuous inhibition that is not related to the target [2].
- Cellular Toxicity: A compound may appear active in a phenotypic screen simply because it is generally toxic to cells, not because it specifically modulates the intended pathway [2].
Using multiple assay platforms with different readout technologies (orthogonal assays) and specifically designed counter-assays is essential to rule out these interference mechanisms and prioritize high-quality hits for resource-intensive lead optimization [2].
2. What are the first steps I should take when I suspect a hit is a false positive from assay interference?
Your first step should be to profile the compound's behavior in dose-response and examine the curve shape. Steep, shallow, or bell-shaped curves can indicate toxicity, poor solubility, or compound aggregation [2]. Following this, a three-pronged experimental approach is recommended [2]:
- Counter-Screens: Implement assays that bypass the biological reaction to test if the compound affects the detection technology itself.
- Orthogonal Assays: Confirm the bioactivity using a completely different readout technology (e.g., confirm a fluorescence-based result with a luminescence- or absorbance-based assay).
- Cellular Fitness Screens: Assess general cell health to ensure the compound's effect is not simply due to cytotoxicity.
3. How can I troubleshoot poor recovery in serial dilution experiments during interference investigations?
Poor or non-linear recovery upon serial dilution is a classic sign of an interfering substance [85]. To troubleshoot:
- Validate Your Diluent: Always use the manufacturer's recommended diluent or one that has been validated to be commutable with your assay matrix. The diluent should not contain measurable levels of the analyte [86] [85].
- Establish Expected Recovery: Validate your dilution protocol using control patient or sample matrices with a known analyte concentration and no interference. This establishes a baseline for expected recovery, as some assays are inherently non-linear or sensitive to matrix effects [85].
- Check for Dilution Linearity: Ensure your protein concentration is sufficient to be detected after dilution. Very high dilutions can cause analyte levels to fall below the assay's limit of quantitation, while substances like detergents in your buffer may cause precipitation upon dilution [86] [87].
4. What specific strategies can mitigate interference from common substances like hemolysis, lipemia, and icterus in biochemical assays?
Interference from hemolyzed, lipemic, or icteric samples is common and requires specific strategies [26]:
- Hemolysis: Visually inspect samples and use automated serum indices. Be aware that interference can be spectral (hemoglobin absorbance) or chemical (release of intracellular components like potassium or enzymes). Sample blanking and bichromatic measurements can help minimize spectral interference [26].
- Lipemia: For lipemic samples, request a fasting specimen or remove lipoproteins via high-speed centrifugation. Avoid using correction equations, as they do not account for all interfering effects like light scattering [26].
- Icterus: The effects of bilirubin are assay-specific. Consult manufacturer data on bilirubin interference, but verify this with in-house testing if suspected in a specific sample [26].
Troubleshooting Guides
Guide 1: Hit Triage and Confirmation Workflow
This workflow outlines the critical steps for moving from primary HTS hits to confirmed, high-quality leads.
Guide 2: Resolving Specific Assay Interferences
The table below summarizes common assay interferents and recommended solutions.
| Interferent | Mechanism of Interference | Recommended Solutions |
|---|---|---|
| Compound Aggregation | Non-specific inhibition via particle formation [2] | Add detergent (e.g., Triton X-100, CHAPS) or BSA to the assay buffer [2]. |
| Fluorescence Interference | Compound autofluorescence or quenching [2] | Switch to an orthogonal, non-fluorescence-based readout (e.g., luminescence, absorbance) or use a time-resolved FRET (TR-FRET) assay [88] [2]. |
| Cytotoxicity | General cell death masquerading as a specific effect [2] | Implement cellular fitness assays (e.g., CellTiter-Glo, MTT, high-content imaging with nuclear stains) [2]. |
| Hemolysis | Spectral interference from hemoglobin; release of intracellular components [26] | Use sample blanking, bichromatic measurements, and visual inspection/serum indices. For in-vitro hemolysis, re-draw sample [26]. |
| Lipemia | Light scattering and volume displacement [26] | Use high-speed centrifugation to remove lipoproteins; collect fasting samples [26]. |
| Biotin (in immunoassays) | Interference with streptavidin-biotin detection systems [85] | Use commercial biotin removal kits or pretreat samples to eliminate biotin [85]. |
Guide 3: Experimental Protocols for Key Hit Confirmation Assays
Protocol 1: Serial Dilution for Interference Investigation [85]
- Purpose: To determine if an interfering substance is affecting analyte measurement.
- Materials: Patient sample, appropriate diluent (manufacturer-recommended or validated in-house), micropipettes, tubes.
- Method:
- Prepare a series of dilutions (e.g., 1:2, 1:4, 1:8) of the patient sample in the chosen diluent.
- Assay each dilution and the neat (undiluted) sample.
- Multiply the measured concentration of each dilution by its dilution factor to obtain the "adjusted" concentration.
- Interpretation: In a sample with no interference, the adjusted concentrations across dilutions should be similar. Non-linear recovery (e.g., low recovery at initial dilutions that plateaus at higher dilutions) suggests the presence of an interfering substance.
Protocol 2: Orthogonal Assay Validation using a TR-FRET Assay [88]
- Purpose: To confirm protein-protein interaction (PPI) inhibitor hits identified in a primary screen using a different detection technology.
- Materials: Purified, tagged proteins (e.g., biotinylated probe, GST-tagged target), donor and acceptor fluorophores (e.g., Terbium cryptate, Alexa Fluor), assay buffer, HTS-compatible microplates.
- Method:
- Incubate the hit compound with the target protein and the biotinylated probe.
- Add the detection mix containing the streptavidin-Terbium cryptate (donor) and the anti-tag-Acceptor fluorophore.
- Allow the FRET complex to form. If the compound disrupts the PPI, FRET is reduced.
- Measure the time-resolved fluorescence emission ratio.
- Interpretation: A dose-dependent decrease in the FRET signal confirms the compound's activity in an orthogonal, non-radioactive, homogenous assay format, increasing confidence in the hit.
Protocol 3: Cellular Target Engagement with CETSA [84]
- Purpose: To confirm direct target engagement of a hit compound in a physiologically relevant, live-cell environment.
- Materials: Cultured cells, hit compounds, thermal cycler or precise heating block, lysis buffer, equipment for protein detection (e.g., Western blot, AlphaLISA).
- Method:
- Treat cells with the hit compound or vehicle control.
- Heat aliquots of the cell suspension to a range of different temperatures.
- Lyse the cells and separate the soluble (non-denatured) protein from the aggregates.
- Quantify the amount of target protein remaining in the soluble fraction at each temperature.
- Interpretation: A shift in the thermal stability curve (melting temperature, Tm) of the target protein in compound-treated cells compared to control cells provides direct evidence of target engagement, helping to eliminate false positives from assay interference.
The Scientist's Toolkit: Key Research Reagent Solutions
The following table details essential reagents and materials used in hit confirmation experiments.
| Item | Function/Benefit |
|---|---|
| Heterophile/Biotin Blocking Reagents | Commercially available reagents (e.g., from Scantibodies, Veravas) used to pre-treat samples and remove antibody- or biotin-mediated interference in immunoassays [85]. |
| Cellular Viability Assay Kits | Reagents like CellTiter-Glo (luminescence-based) or MTT (absorbance-based) to assess cellular fitness and rule out general cytotoxicity as a cause for activity [2]. |
| Structured Illumination Microscysis Kits | High-content analysis kits (e.g., cell painting dyes, MitoTracker, nuclear stains) for detailed, single-cell morphological profiling to assess compound-induced phenotypic changes and toxicity [2]. |
| TR-FRET Detection Kits | Homogeneous assay kits utilizing Time-Resolved Fluorescence Resonance Energy Transfer, which minimizes short-lived background fluorescence interference, ideal for studying PPIs and other targets [88]. |
| CETSA Kits/Reagents | Kits or validated reagents for performing Cellular Thermal Shift Assays, providing a direct method for confirming target engagement in live cells [84]. |
| Validated Sample Diluents | Assay-specific diluents formulated to match the standard curve matrix, which are critical for achieving accurate recovery in serial dilution experiments and minimizing matrix effects [86]. |
| SPR Chips & Buffers | Surface Plasmon Resonance chips and optimized running buffers for label-free, biophysical analysis of binding kinetics and affinity during orthogonal confirmation [2]. |
Visualization of Orthogonal Assay Relationships
This diagram illustrates how different orthogonal assay types relate to the primary screen and what aspects of hit quality they confirm.
Integrating Interference Data into the Final Hit Selection and Prioritization Workflow
FAQs: Addressing Common Questions on Interference in HTS
Q1: What are the most common types of compound-mediated assay interference in HCS/HTS? Assay interference can be broadly divided into two, often overlapping, categories:
- Technology-Related Interference: This includes compound autofluorescence (where the compound itself emits light) and fluorescence quenching (where the compound absorbs light), which directly interfere with optical detection systems [13]. Additionally, compounds can act as luciferase inhibitors, directly interfering with luminescence-based reporter assays [5].
- Biology-Related Interference: This includes compound-induced cytotoxicity and dramatic changes in cell morphology or adhesion [13]. These effects can cause cell loss or alter the cellular context of the assay, leading to false positives or negatives that are not due to modulation of the intended target [13]. Other undesirable mechanisms include nonspecific chemical reactivity, colloidal aggregation, and redox cycling [13].
Q2: How prevalent is assay interference in a typical chemical library? Interference is not a rare event. Data from the Tox21 program, which screened over 8,300 chemicals, found that the prevalence of actives in interference assays ranged from 0.5% (for red autofluorescence) to 9.9% (for luciferase inhibition) [5]. Another study notes that over 5% of PubChem chemical libraries may have autofluorescence properties [5].
Q3: What experimental strategies can I use to identify and filter out interferent compounds? A multi-faceted approach is recommended:
- Counter-Screens: Run dedicated assays designed to detect specific interference mechanisms, such as luciferase inhibition or autofluorescence at relevant wavelengths, against your hit compounds [5] [65].
- Orthogonal Assays: Confirm hit activity using a secondary assay that employs a fundamentally different detection technology (e.g., switching from a fluorescence-based readout to a mass spectrometry-based or biophysical method) [13] [89] [65].
- Hit Confirmation: Re-test primary hits in a dose-response format using the original assay to confirm reproducibility and determine potency (IC50/EC50) [65].
- Image and Data Analysis: For high-content screening, manually review images of hit compounds and perform statistical analysis of parameters like nuclear count and fluorescence intensity to flag outliers caused by cytotoxicity or interference [13].
Q4: Are there computational tools to predict assay interference before screening? Yes, in silico tools are increasingly available. Machine learning models trained on large HTS datasets can predict the likelihood of a compound being an interferent. For example:
- InterPred: A web-based tool that predicts the probability of a chemical interfering with fluorescent intensity or luciferase assays with accuracies of around 80% [5].
- MVS-A (Minimal Variance Sampling Analysis): An advanced data analysis tool that prioritizes true positives and reduces false positive hits by calculating an influence score for each compound based on patterns learned from the HTS data itself [90].
Troubleshooting Guides: Diagnosing and Solving Interference Issues
Problem: A high number of false positives in a fluorescence-based assay.
| Possible Cause | Investigation & Solution |
|---|---|
| Compound Autofluorescence | Investigation: Compare the emission spectrum of the hit compound alone to that of your assay's fluorophore. Solution: Implement an autofluorescence counter-screen or switch to an orthogonal, non-fluorescence-based assay (e.g., mass spectrometry) [13] [65]. |
| Fluorescence Quenching | Investigation: Test if the compound reduces the signal from a control fluorophore in the absence of the biological system. Solution: Use a different fluorescent probe with non-overlapping spectra or transition to an orthogonal detection method [13] [5]. |
| Cytotoxicity & Altered Morphology | Investigation: Check secondary parameters like cell count, nuclear size, or membrane integrity. In high-content screening, review the images. Solution: Include a viability assay (e.g., measuring ATP levels) in your screening cascade to filter out cytotoxic compounds [13]. |
Problem: Inconsistent or irreproducible results with a luminescence reporter assay.
| Possible Cause | Investigation & Solution |
|---|---|
| Luciferase Inhibition | Investigation: Perform a counter-screen in a cell-free system with the luciferase enzyme and substrate. A drop in luminescence indicates direct inhibition. Solution: Use a dedicated luciferase inhibition assay to flag these compounds, or confirm activity with an orthogonal assay [5] [65]. |
| Cytotoxicity | Investigation: As above, measure cell viability at the time of the assay readout. A loss of signal could be due to cell death rather than pathway modulation. Solution: Filter hits through a viability counter-screen [13]. |
Experimental Protocols
Protocol 1: Cell-Based Autofluorescence Counter-Screen
Purpose: To identify compounds that autofluoresce within the spectral range of your primary assay, which is critical for filtering false positives from fluorescence-based HCS/HTS [5].
Materials:
- The same cell line used in your primary assay (e.g., HEK-293 or HepG2) [5]
- Cell culture medium
- Assay plates (e.g., 384-well)
- Compound hits from primary screen
- Vehicle control (e.g., DMSO)
- Plate reader or high-content imager capable of fluorescence detection
Method:
- Cell Seeding: Seed cells into assay plates at the same density used in your primary assay and culture for the standard duration [5].
- Compound Treatment: Treat cells with hit compounds at the same concentration used in the primary screen. Include vehicle control wells.
- Incubation: Incubate under standard culture conditions for the same period as your primary assay.
- Signal Measurement: Read the plates using the same excitation and emission wavelengths as your primary assay, but omit the fluorescent probe or dye.
- Data Analysis: Compounds that produce a significantly higher signal than the vehicle control in the absence of the probe are flagged as autofluorescent interferents.
Protocol 2: Limited Proteolysis-Mass Spectrometry (LiP-MS) for Orthogonal Hit Confirmation
Purpose: To provide an orthogonal method for confirming target engagement and characterizing binding, which is independent of optical interference [89].
Materials:
- Purified target protein
- Hit compounds and inactive controls (in DMSO)
- Proteolytic enzyme (e.g., proteinase K or chymotrypsin)
- PBS buffer (or other appropriate non-denaturing buffer)
- LC-MS system
Method:
- Protein-Compound Incubation: Incubate the purified target protein (e.g., 10 µM) separately with each hit compound (e.g., 100 µM) and a DMSO vehicle control in a non-denaturing buffer for 1 hour at room temperature [89].
- Limited Proteolysis: Add a nonspecific protease (e.g., proteinase K) to each sample and incubate for a short, optimized time (e.g., 5 minutes) [89].
- Reaction Quenching: Quench the proteolysis reaction, typically by denaturing the sample.
- LC-MS Analysis: Analyze the proteolytic fragments by Liquid Chromatography-Mass Spectrometry (LC-MS) [89].
- Data Interpretation: Compare the mass spectra of compound-treated samples to the vehicle control. A compound that binds to and stabilizes the protein will result in a reduction of proteolytic cleavage at specific sites, indicating true target engagement and providing information on the binding region [89].
Workflow Visualization
Hit Triage and Prioritization Workflow
Assay Interference Mechanisms
The Scientist's Toolkit: Key Research Reagent Solutions
The following table lists essential materials and tools for addressing assay interference in HTS.
| Tool / Reagent | Function in Interference Mitigation |
|---|---|
| HEK-293 & HepG2 Cell Lines | Standard cell models used in dedicated autofluorescence counter-screens to measure compound interference under cell-based conditions [5]. |
| Firefly Luciferase & D-Luciferin | Reagents for setting up a cell-free luciferase inhibition counter-screen to identify compounds that directly inhibit the common reporter enzyme [5]. |
| Proteinase K / Chymotrypsin | Non-specific proteases used in Limited Proteolysis-Mass Spectrometry (LiP-MS) workflows to detect protein structural changes upon ligand binding, providing an orthogonal, non-optical confirmation of target engagement [89]. |
| Strictly Standardized Mean Difference (SSMD) | A powerful statistical metric for quality control in HTS. It provides a standardized, interpretable measure of effect size, helping to ensure assay robustness and reliably distinguish active from inactive compounds [91]. |
| InterPred Web Tool | An open-source, web-based platform that uses machine learning models to predict the probability of a chemical structure interfering with fluorescence or luciferase assays before physical screening [5]. |
Conclusion
Assay interference is an inherent challenge in HTS that demands a systematic and multi-faceted approach. The key to success lies in integrating foundational knowledge of interference mechanisms with proactive computational predictions, rigorous assay optimization, and conclusive multi-layered validation. The future of reliable HTS is increasingly intertwined with artificial intelligence, as tools like InterPred demonstrate the power of machine learning to flag potential interferents before costly experiments begin. By adopting these integrated strategies—from robust experimental design and QC to the application of advanced in silico models—researchers can significantly enhance the fidelity of their screening data. This not only conserves precious time and resources but also accelerates the discovery of genuine bioactive compounds, thereby strengthening the entire pipeline from basic research to clinical drug development.
References
- 1. ASSAY INTERFERENCE - A limiting factor in HTS? [https://www.ddw-online.com/assay-interference-a-limiting-factor-in-hts-997-200308/]
- 2. Brief Guide: Experimental Strategies for High-Quality Hit ... [https://pmc.ncbi.nlm.nih.gov/articles/PMC8293735/]
- 3. PAINS in the Assay: Chemical Mechanisms of ... [https://pmc.ncbi.nlm.nih.gov/articles/PMC4360378/]
- 4. Statistical approaches enabling technology-specific assay ... [https://www.sciencedirect.com/science/article/pii/S2667318524000060]
- 5. High-Throughput Screening to Predict Chemical-Assay ... [https://www.nature.com/articles/s41598-020-60747-3]
- 6. Firefly luciferase in chemical biology - PubMed Central - NIH [https://pmc.ncbi.nlm.nih.gov/articles/PMC3449281/]
- 7. A Specific Mechanism for Non-Specific Activation in ... [https://pmc.ncbi.nlm.nih.gov/articles/PMC2729322/]
- 8. Firefly luciferase inhibition [https://www.sciencedirect.com/science/article/pii/S1011134410001557]
- 9. Interference of metal ions on the bioluminescent signal ... [https://www.frontiersin.org/journals/chemistry/articles/10.3389/fchem.2024.1436389/full]
- 10. Apparent Activity in High-Throughput Screening: Origins ... [https://pmc.ncbi.nlm.nih.gov/articles/PMC2878863/]
- 11. Luciferase-based Reporter Assay Troubleshooting Guide [https://www.goldbio.com/blogs/articles/luciferase-based-reporter-assay-troubleshooting-guide?srsltid=AfmBOoqmOIttScVn05A5xNXl-J06UmmxnTul09S7EIrL2Q9lPjHjwfJd]
- 12. How to reduce autofluorescence [https://www.ptglab.com/news/blog/how-to-reduce-autofluorescence/?srsltid=AfmBOopdyqrhlBbvV3VmUUMLxM58-KLUgsx4UQlZEts-lj1Z7mdihKox]
- 13. Interference and Artifacts in High-content Screening - NCBI - NIH [https://www.ncbi.nlm.nih.gov/books/NBK615088/]
- 14. What is cross-talk? [https://www.bmglabtech.com/en/what-is-crosstalk/]
- 15. Immersion‐Based Clearing and Autofluorescence ... [https://pmc.ncbi.nlm.nih.gov/articles/PMC12589860/]
- 16. Fluorescence crosstalk reduction by modulated excitation ... [https://pubs.rsc.org/en/content/articlehtml/2023/lc/d2lc01016j]
- 17. Anti fluorescence attenuation sealing agent, by Solarbio [https://www.pubcompare.ai/product/Wbi1NZcByx5TsEHUhA3B/]
- 18. Assay Interference by Chemical Reactivity - NCBI - NIH [https://www.ncbi.nlm.nih.gov/books/NBK326709/]
- 19. Identification of Compounds That Interfere with High ... - PMC [https://pmc.ncbi.nlm.nih.gov/articles/PMC6856845/]
- 20. Filtering promiscuous compounds in early drug discovery [https://www.sciencedirect.com/science/article/abs/pii/S1359644616300307]
- 21. The Burden of the “False‐Negatives” in Clinical Development [https://pmc.ncbi.nlm.nih.gov/articles/PMC6402187/]
- 22. Cost of Breast-Related Care in the Year Following False ... [https://pmc.ncbi.nlm.nih.gov/articles/PMC3079487/]
- 23. Costs of Misclassification - Toxicity Testing - NCBI Bookshelf [https://www.ncbi.nlm.nih.gov/books/NBK216550/]
- 24. Troubleshooting & FAQs [https://www.cygnustechnologies.com/resources/guidelines?srsltid=AfmBOop2zLH1nGCJL1HPmefnotcZHlJGNG02JCmpLtVyRNA8JIUvK9dj]
- 25. HTS Assay Validation - NCBI [https://www.ncbi.nlm.nih.gov/books/NBK83783/]
- 26. Assay Interference: A Brief Review and Helpful Hints [https://sundiagnostics.us/2023/04/assay-interference-a-brief-review-and-helpful-hints/]
- 27. The Implications of False Positives in Diagnostic Testing [https://www.apbiocode.com/false-positives/]
- 28. A Researcher's Guide to Optimizing High-throughput ... [https://www.ranomics.com/navigating-the-hurdles-a-researchers-guide-to-optimizing-high-throughput-screens-library-design-and-protein-engineering]
- 29. A Beginner's Guide to QSAR Modeling in Cheminformatics ... [https://neovarsity.org/blogs/cheminformatics-qsar-beginner-guides]
- 30. Integration of QSAR models with high throughput ... [https://pubmed.ncbi.nlm.nih.gov/40023049/]
- 31. AI-Integrated QSAR Modeling for Enhanced Drug Discovery [https://pmc.ncbi.nlm.nih.gov/articles/PMC12525248/]
- 32. High-throughput screening data generation, scoring and ... [https://jcheminf.biomedcentral.com/articles/10.1186/s13321-025-01001-8]
- 33. Machine Learning 101: How to train your first QSAR model [https://optibrium.com/knowledge-base/machine-learning-101-how-to-train-your-first-qsar-model-blog/]
- 34. High Throughput Screening Assays for Drug Discovery [https://bellbrooklabs.com/high-throughput-screening-assays-drug-discovery/?srsltid=AfmBOopPlydrmM5Vkd6P4i1svYidJyPCAWRJ_86J1qBM4U16Jq37Ir3T]
- 35. Interpretable web-based machine learning model for ... [https://pmc.ncbi.nlm.nih.gov/articles/PMC12147252/]
- 36. HMI-PRED: A Web Server for Structural Prediction of Host ... [https://www.sciencedirect.com/science/article/abs/pii/S0022283620300899]
- 37. Error Messages - intrepidcs API [https://cdn.intrepidcs.net/support/neoVIDLL/apiErrorMessages.htm]
- 38. Correction for interference by test samples in high- ... [https://pubmed.ncbi.nlm.nih.gov/19643982/]
- 39. FAQs [https://www.intrepid-networks.com/faqs]
- 40. 11 Troubleshooting and advanced configuration [https://forums.intercede.com/wp-content/uploads/Flare/MyID-v1205-PRO/Content/Operator%20Client/Troubleshooting/Troubleshooting.htm]
- 41. ChemFH: an integrated tool for screening frequent false ... [https://pmc.ncbi.nlm.nih.gov/articles/PMC11223804/]
- 42. Structural Alert Filters - medchem [https://medchem-docs.datamol.io/stable/tutorials/Structural_Filters.html]
- 43. Luciferase-based Reporter Assay Troubleshooting Guide [https://www.goldbio.com/blogs/articles/luciferase-based-reporter-assay-troubleshooting-guide?srsltid=AfmBOooV_M_sbhSqdxP8d3jP2ciTh7DLAHTMpAaSkJzVABvASso96sIR]
- 44. Tox21 | National Institute of Environmental Health Sciences [https://www.niehs.nih.gov/research/programs/tox21]
- 45. Calculating Inter- and Intra-Assay Coefficients of Variability [https://salimetrics.com/calculating-inter-and-intra-assay-coefficients-of-variability/]
- 46. Calculating a Z-factor to assess the quality of a screening ... [https://www.graphpad.com/support/faq/calculating-a-z-factor-to-assess-the-quality-of-a-screening-assay/]
- 47. Advanced Assay Development Guidelines for Image-Based ... [https://www.ncbi.nlm.nih.gov/books/NBK126174/]
- 48. Troubleshooting & FAQs [https://www.cygnustechnologies.com/resources/guidelines?srsltid=AfmBOoq0Sh3eApUKhFVkv-WAUOtiGJSGR6P72wAp2Ktq9DO0Lo2wvAdm]
- 49. Miniaturized High-Throughput Fluorescent Assay for ... [https://pmc.ncbi.nlm.nih.gov/articles/PMC4250932/]
- 50. High-Throughput Screening Assay Miniaturization [https://focus.gbo.com/blog/hts/the-power-of-small-high-throughput-screening-assay-miniaturization]
- 51. The Ultimate Guide to Assay Miniaturization [https://dispendix.com/blog/the-ultimate-guide-to-assay-miniaturization]
- 52. New Assay Technology Could Reshape Approach to Drug ... [http://ncats.nih.gov/news-events/news/new-assay-technology-could-reshape-approach-drug-discovery]
- 53. High-Throughput Screening (HTS): A Simple Guide ... [https://www.chemcopilot.com/blog/hts-material-discovery]
- 54. Assay Interference by Aggregation - NCBI - NIH [https://www.ncbi.nlm.nih.gov/books/NBK442297/]
- 55. High-Throughput Quality Control of DMSO Acoustic ... [https://www.sciencedirect.com/science/article/pii/S2472630322016302]
- 56. High-throughput quantification of the effect of DMSO on ... [https://pmc.ncbi.nlm.nih.gov/articles/PMC6620243/]
- 57. Interference and Recovery Experiments - Westgard QC [https://www.westgard.com/lessons/basic-method-validation/lesson27.html]
- 58. Interferences in Immunoassay - PMC - PubMed Central - NIH [https://pmc.ncbi.nlm.nih.gov/articles/PMC1904417/]
- 59. Recovery Factor Determination in Cleaning Validation [https://www.pharmaguideline.com/2013/11/recovery-factor-and-its-determination.html]
- 60. Interferences [https://eclinpath.com/test-basics/interferences/]
- 61. Protocol for high-throughput compound screening using ... [https://pmc.ncbi.nlm.nih.gov/articles/PMC7985391/]
- 62. Compound-Mediated Assay Interferences in Homogeneous ... [https://www.ncbi.nlm.nih.gov/books/NBK553584/]
- 63. Solutions to immunoassay interference, cross reactivity and ... [https://www.gyrosproteintechnologies.com/spinblog/immunoassay-interference-crossreactivity-challenges]
- 64. Managing Matrix Interference in Immunoassays: Tips and ... [https://www.bio-connect.nl/news/managing-matrix-interference-in-immunoassays-tips-and-solutions/]
- 65. High Throughput Screening (HTS) Services [https://www.evotec.com/solutions/drug-discovery-preclinical-development/discovery/hit-identification-services/high-throughput-screening-hts-services]
- 66. The relevance of homogeneous radiometric assays in ... [https://www.drugtargetreview.com/article/33367/the-relevance-of-homogeneous-radiometric-assays-in-modern-drug-discovery/]
- 67. Elisa Troubleshooting -Technical Issues | Surmodis [https://shop.surmodics.com/elisa-troubleshooting-guide]
- 68. Optimizing your ELISA Assays [https://www.bmglabtech.com/en/blog/optimizing-your-elisa-assays/]
- 69. Overcoming target interference in bridging anti-drug ... [https://pmc.ncbi.nlm.nih.gov/articles/PMC12413034/]
- 70. Hallmarks of Antibody Validation: Orthogonal Strategy [https://www.cellsignal.com/about-us/approach-validation-principles/orthogonal-data?srsltid=AfmBOoqhMavelVUgJ4Z2UFzlaDl-XxARHZ5jwhdE7ewNlIcDm5jgTBS2]
- 71. Table 2. [Frequently asked questions about HCS artifacts ... [https://www.ncbi.nlm.nih.gov/books/NBK615088/table/Intandart.T.frequently_asked_questions_a/?report=objectonly]
- 72. Troubleshooting & FAQs [https://www.cygnustechnologies.com/resources/faqs/?srsltid=AfmBOorhR6ndLwxI_D8DL6pQJCfJiSIgkYgZjfe91Uq5m7xW12NsRpY-]
- 73. How To Overcome Potency Assay Development ... [https://www.cellandgene.com/doc/how-to-overcome-potency-assay-development-challenges-for-gene-therapies-0001]
- 74. Transforming high-throughput screening with mass ... [https://www.ddw-online.com/transforming-high-throughput-screening-with-mass-spectrometry-19633-202210/]
- 75. Drug Discovery Assays Support—Troubleshooting [https://www.thermofisher.com/us/en/home/technical-resources/technical-reference-library/drug-discovery-development-support-center/drug-discovery-assays-support/drug-discovery-assays-support-troubleshooting.html]
- 76. Troubleshooting & FAQs [https://www.cygnustechnologies.com/resources/guidelines?srsltid=AfmBOopOp30q4HqSbk6yG1dLSCtfz9i4yWywS8BdPleUT3yZM8V1EjKO]
- 77. Use of High-Throughput Mass Spectrometry to Reduce ... [https://www.sciencedirect.com/science/article/pii/S2472555222071957]
- 78. Avoiding Fluorescence Assay Interference—The Case for ... [https://pmc.ncbi.nlm.nih.gov/articles/PMC4840916/]
- 79. Assay interferences [https://www.pathologyoutlines.com/topic/chemistryassayinterferences.html]
- 80. An Introduction To Immunoassay Interference | Blog [https://www.biosynth.com/blog/immunoassay-interference]
- 81. Upstream Sample Processing and Library Preparation [https://pmc.ncbi.nlm.nih.gov/articles/PMC6213814/]
- 82. IHC Troubleshooting Guide [https://www.thermofisher.com/us/en/home/life-science/protein-biology/protein-biology-learning-center/protein-biology-resource-library/pierce-protein-methods/ihc-troubleshooting-guide.html]
- 83. How to Avoid Common Sample Preparation Issues in HTS [https://www.linkedin.com/advice/0/what-most-common-sample-preparation-issues-cmmjc]
- 84. Validating Drug Discovery Hits with CETSA® Technology [https://www.pelagobio.com/cetsa-drug-discovery-resources/blog/hit-validation-drug-discovery/]
- 85. Investigating Immunoassay Interferences [https://myadlm.org/cln/articles/2022/april/investigating-immunoassay-interferences]
- 86. Troubleshooting & FAQs [https://www.cygnustechnologies.com/resources/guidelines?srsltid=AfmBOor2aWd3z7TA1kB3s51f3Rll6kxTMlG-PDGzn2fBZ39lc3IWA4kQ]
- 87. Bradford Assay Troubleshooting Guide Common Errors ... [https://go.zageno.com/blog/bradford-assay-troubleshooting]
- 88. Development of a high-throughput TR-FRET assay to ... [https://www.sciencedirect.com/science/article/pii/S2472555225000309]
- 89. A Hit Prioritization Strategy for Compound Library ... [https://pmc.ncbi.nlm.nih.gov/articles/PMC12461684/]
- 90. Hit Prioritization for High Throughput Screening with MVS-A [https://medium.com/@kapeluha.ann00/hit-prioritization-for-high-throughput-screening-with-mvs-a-d6750540b89f]
- 91. Integrating AUROC and SSMD for Quality Control in High- ... [https://www.sciencedirect.com/science/article/pii/S2472555225000620]